[Fixed] This device is not present (Code 24) – Windows 10, 8 or 7
[Fixed] This device is not present (Code 24) – Windows 10, 8 or 7
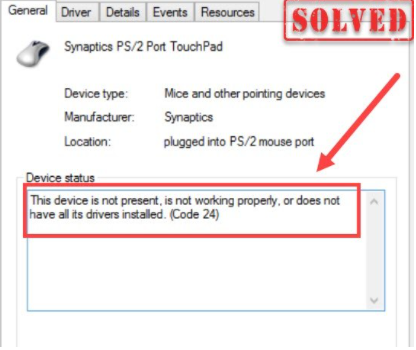
If one of your devices stops working and you open Device Manager, you will see the following error message: “This device is not present, is not functioning properly, or does not have all of its drivers installed.” (Code 24)“, don’t panic; it’s a common issue, and there are some quick remedies that can help you get rid of it right away.
Try these fixes
You may not need to try all of them; simply work your way down the list until you discover one that works for you.
- Restart your computer
- Restart or replug your hardware
- Reinstall or update your device driver
- Install all Windows updates
Fix 1: Restart your computer
When the hardware isn’t properly configured, you could get the Code 24 problem. So, before you try anything more sophisticated, try rebooting your machine and letting Windows configure itself. You’ll be astonished at how quickly this approach works most of the time.
If restarting your computer doesn’t work, move on to the next solution listed below.
Fix 2: Restart or replug your hardware
This issue could potentially be caused by faulty hardware. It’s possible that your gear isn’t working properly or isn’t set up correctly. Make sure your hardware is in good working order and is securely plugged into your computer.
If your gadget has a power button, try rebooting it and seeing what happens. You might also try unplugging the device, waiting a few seconds, and then plugging it in again.
If restarting or replugging your hardware does not solve the problem, proceed to the next step.
Fix 3: Reinstall or update your device driver
Drivers are an integral part of every computer. They serve as a link between your computer and your hardware. Typically, Windows will utilize or install the generic driver to assist in the setup of your device, but this isn’t always the case.
In some circumstances, the Code 24 error means you’re using an out-of-date or malfunctioning device driver. As a result, you’ll have two options for resolving this issue:
Option 1: Reinstall your device driver
To reinstall your device driver, simply follow these simple steps:
Note: The screenshots are from Windows 10, however, the instructions are also applicable to Windows 8, 7, and Vista.
1. To open the Run box, press the Windows logo key and R (the r key) at the same time on your keyboard.
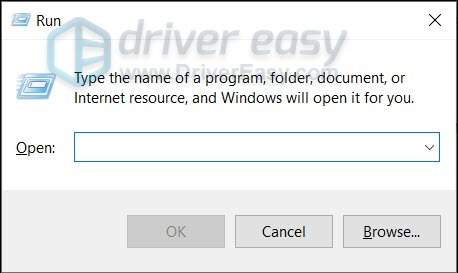
2. Type or paste devmgmt.msc. To open Device Manager, tap OK.

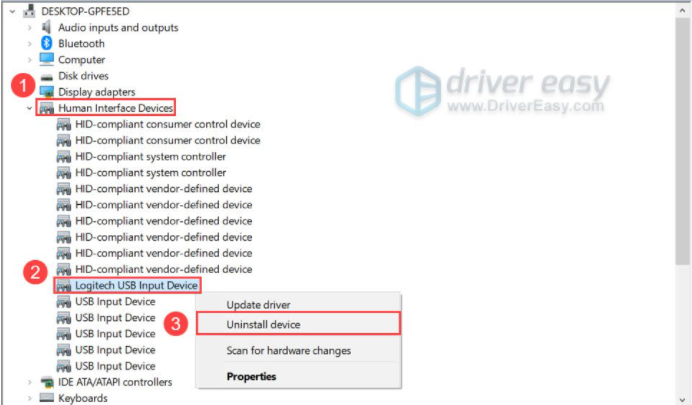
3. Tap to expand the category your device is in. Select Uninstall device after right-clicking the device you want to reinstall the driver for. (As an example, we’ll utilize the Logitech mouse driver.)
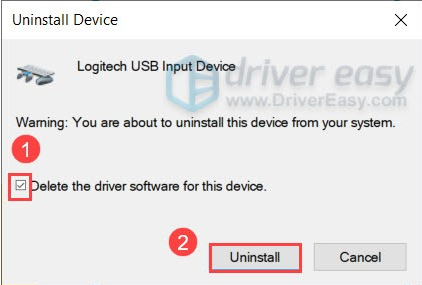
4. Check the box next to Delete the driver software for this device in the pop-up window. Select Uninstall.
5. Restart your PC.
When you’re finished, Windows should have automatically configured your device with the generic driver.
If the problem continues after reinstalling your driver, you can update your device driver using another option listed below.
Option 2: Update your device driver (Recommended)
Updated drivers have the same impact as reinstalled drivers in most circumstances. It’s also a good idea to try it first because it’s usually easier and safer.
If you want, you can do this manually by going to each manufacturer’s download page, finding the appropriate drivers, and so on. However, this takes time and technical knowledge. We recommend Driver Easy if you’re not comfortable messing around with device drivers. It’s a program that identifies, downloads, and installs any necessary driver updates for your computer.
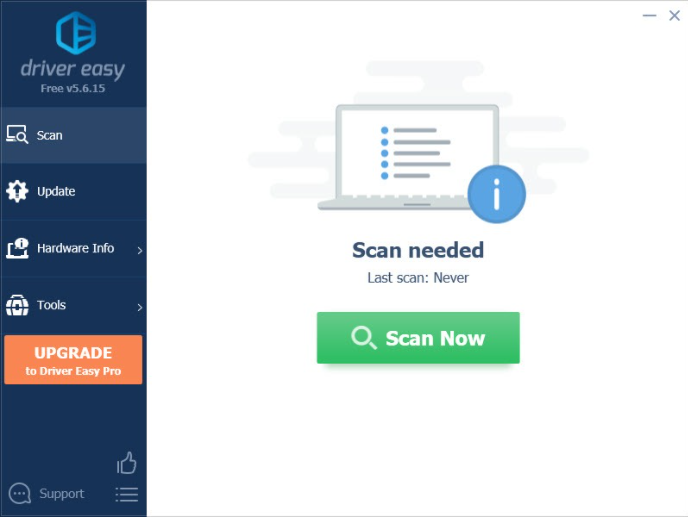
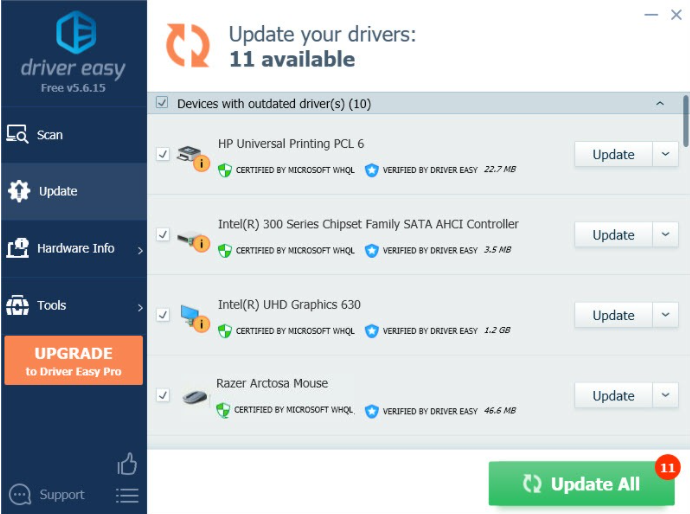
1. Download and install Driver Easy.
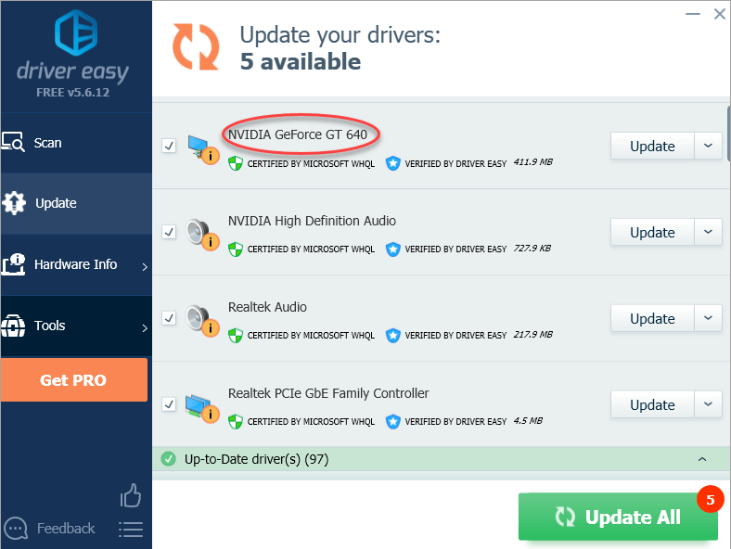
2. Launch Driver Easy and then select Scan Now. After that, Driver Easy will check your computer for any problematic drivers.
3. To automatically download and install the correct version of all missing or out-of-date drivers on your system, tap Update All.
(You’ll be offered to upgrade to the Pro version when you click Update All.) If you don’t want to pay for the Pro version, you can still download and install all of the drivers you need using the free version; you’ll simply have to do it one at a time, and manually install them, the normal Windows way.)
Restart your computer after you’ve updated your device drivers to see if your hardware is now operational.
If this strategy doesn’t work for you, move on to the next one down below.
Fix 4: Install all Windows updates
Patches for broken or missing drivers are sometimes included in Windows updates. If you can’t recall when you last updated system updates, now is the time to do so since it could save your day.
The procedures to install system updates on Windows 10, 8, or 7 are as follows:
Windows 10
1. To open the Windows Settings app, hit the Windows logo key and I (the I key) at the same time on your keyboard. Select Update & Security.
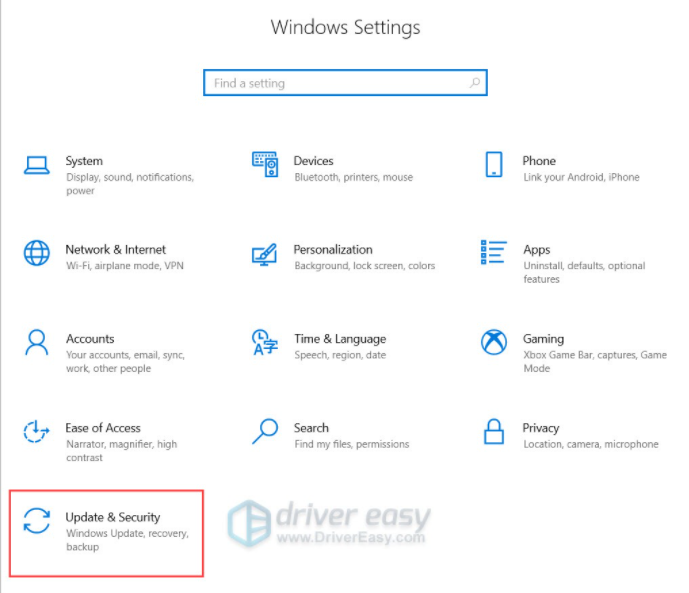
2. Tap Check for updates. Windows may take up to an hour to download and install all available updates.

Tip: Repeat these steps until it says “You’re up to date” when you click Check for updates again to ensure you’ve installed all of the system updates.
Windows 8
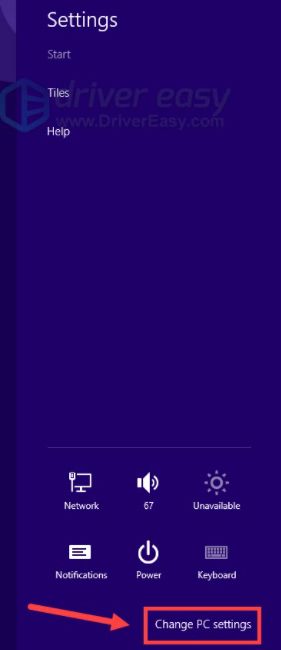
1. Press the Windows logo key and I (the I key) on your keyboard at the same time, tap Change PC settings on the right menu.
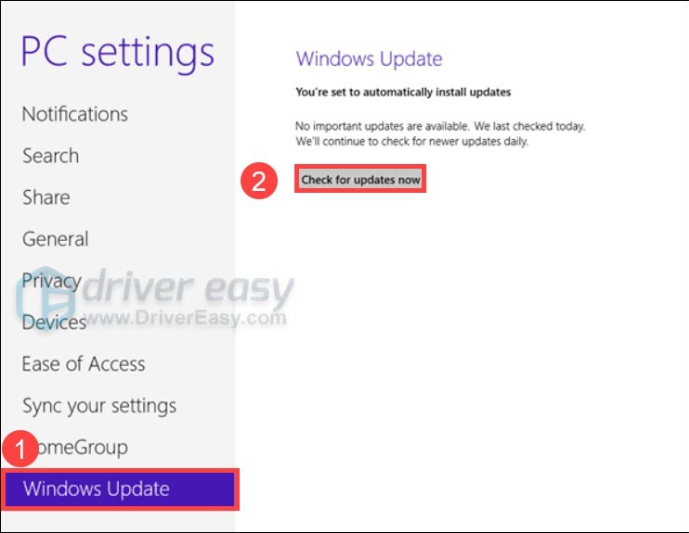
2. Tap Windows Update on the left menu. Tap Check for updates now.
Windows 7
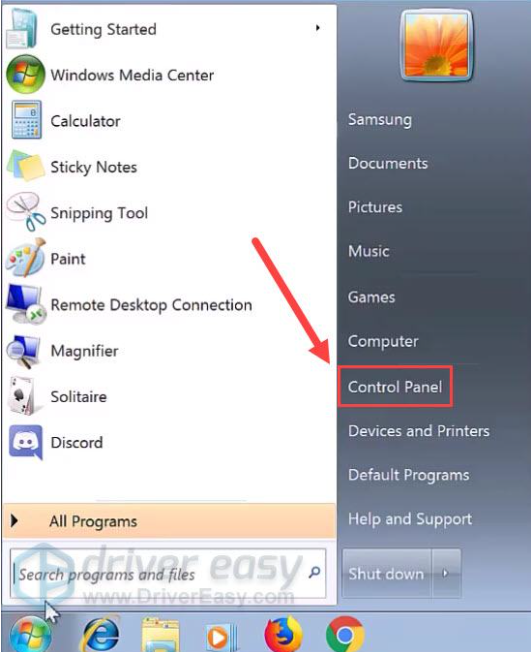
1. Tap the Windows logo key on your keyboard. Choose Control Panel.
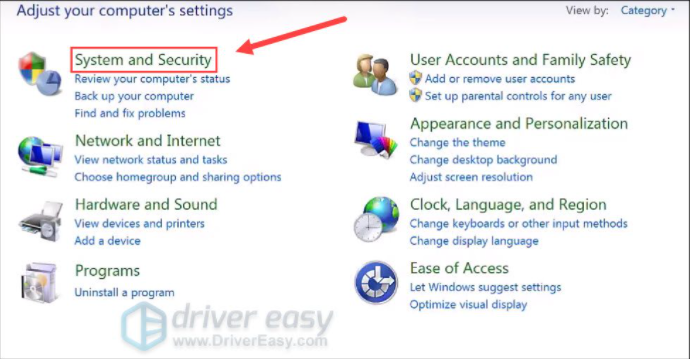
2. Choose System and Security.
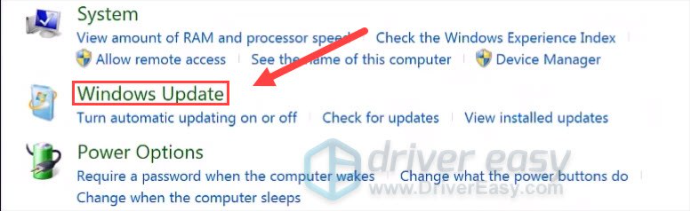
3. Tap Windows Update.
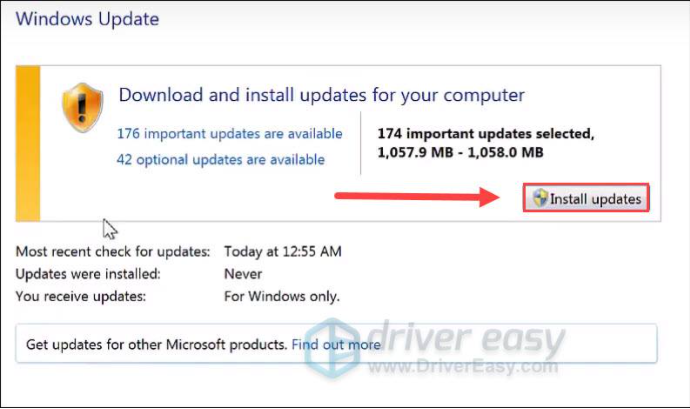
4. Tap the Install updates button. Windows will take some time (up to an hour) to install all of the updates.
Restart your computer after applying all of the system updates to see if the error has been resolved.