Download Windows 8.1 ISO files [USB & DVD Setup]
If you are looking for the Windows 8.1 ISO download files, then you need to stop as we did the job for you. Keep on reading to find the right download links.
capnamanh.com
If you are looking for the Windows 8.1 ISO download files, then you need to stop as we did the job for you. Keep on reading to find the right download links.
Are you a Raspberry Pi fan who likes Retropie and tiny games? Probably
Are you using your Raspberry Pi to play the latest PC games? Nope
However, beginning December 2018, you may play Steam games on a $35 machine. This tutorial will show you how to do it.
The Steam Link is a product from Steam to replicate a computer screen on a gaming device (Steam Machine). It’s available on Raspberry Pi OS, so it’s possible to install it, to play recent games on the Raspberry Pi.
I’ll teach you how to do it; it’s not difficult.
But first, let me explain where it comes from and how it functions.
As is customary, I’ll begin by ensuring that you understand the background of this session.
Steam is a well-known game marketplace.
You can explore their game collection and then buy and download a ton of games, just like an app store on your phone.
Now, Steam has over 150 million players and 15,000 games in store.

Over the years, Steam has brought a lot of technological innovation in the game distribution.
Steam, which launched in 2003, entered a competitive market where games were mostly sold in physical boxes.
With the globalization of the Internet, this concept is now being implemented by a growing number of players.
Steam also pushed for the acceptance of multi-platform gaming.
In 2010, they worked on a macOS version. And in 2013, a Linux version became available.
This was a significant advancement for these platforms.
They had previously been out of the way in the world of video games.
Steam has also attempted to introduce its product to game consoles, but with fewer degrees of success.
They began by installing their program on the PlayStation 3 console (for Portal2 for example).
In 2013, things sped up with the release of Steam OS and the beginning of the Steam Machine concept.
Steam OS is a Debian-based Linux system that allows you to play Steam games on another computer.
This machine is the Steam Machine, which was available in 2015 and ran Steam OS.
And finally in 2015, Steam announced new hardware in this catalog: the Steam Link.
The Steam Link is a compact device that includes USB, HDMI, and RJ45 connectors.
It enables us to play our favorite games on the television, similar to a console.
But this tiny box isn’t truly in charge of the games.
It’s just a screen sharing system that you can play with other controllers and watch on your TV or computer screen.
The Steam Link hardware and the Raspberry Pi have a number of things in common.
This is how the Steam Link appears to look likes inside the box:

Yes, it reminds us of something… a small single board running Debian.
Recently, the Steam Link software was released in the Raspberry Pi OS repository, so we can install it easily and freely on Raspberry Pi.
That is the purpose of this post, so let’s get started with the installation.
The first thing you need to do, if not already done, is to install the latest Raspberry Pi OS version on your Raspberry Pi.
Choose the Desktop version and, if possible, try to use Raspberry Pi 4.
Even if we’re simply doing a screen share, you should start with the more powerful Raspberry is a good idea.
Then follow the installation steps below:
sudo apt updatesudo apt upgradesudo apt install steamlinkIt’s already finished for the installation part.
Then start the application:


Here is the screen you should get:
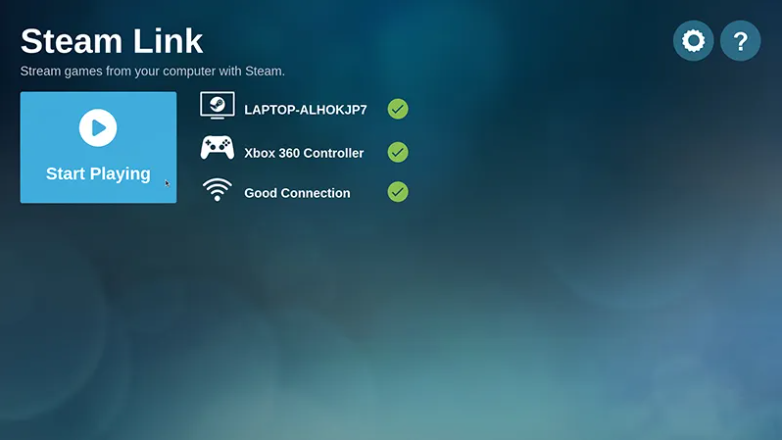
Now click on “Start playing” and follow theses step:

On the Game page, you have two main parts:

I’m not sure if it’ll be of interest to you, but I came across something amusing.
If you force quit Steam on the computer (ALT+F4), the screen mirroring stays active.
On the television, you gain access to your computer.
This enables you to watch movies, photos, documents, and webpages on your television.
If you don’t have a smart TV yet, this could be useful to bring the power of Windows apps on the Raspberry Pi.
A complete step-by-step guide with proper upgrade image sequence is available on this page about upgrade windows 10 to windows 11. Because Windows 11 released on June 24, 2021, users of Windows 10 and Windows 7 will want to upgrade their systems to Windows 11. Windows 11 is currently a free update, and anyone can upgrade from Windows 10 to Windows 11 for no cost.
On this page, we’ll answer a variety of questions about the upgrading, including system requirements, time, upgrade process, and other facts. Windows 11 was previously leaked, and many of you may have downloaded it. Now is your chance to receive the most up-to-date and bug-free version of Windows 11, which you can get directly from Microsoft’s official website. You can upgrade your existing Windows (whether it’s Windows 10 or Windows 11) to Win11 by following the instructions on this website.
The following are the details that will be provided on this page:
Certain prerequisites must be completed in order to install Windows 11 on your computer. You may experience problems utilizing Win11 on your PC if your machine is not advanced enough. Here are the Windows 11 system requirements for your PC or laptop.

You don’t need to go to any other website to get Windows 11. You can just look for a new update in the system updates section of your existing Windows. If Windows 11 is available, it will appear in your upgrade area. To install the domain straight to your PC, simply click the Download and Install option.
You can also get Windows 11 from external sources if you don’t wish to upgrade to Windows 11 the easy method.
Upgrade Windows 7 to Windows 11 can be done in a variety of ways. We’ll talk about the easiest technique first.
1. Tap on the Start Menu and tap on the “Control Panel” Button.

2. You will now see a section labeled “Windows Updates” on the Control Panel page. You’ll be brought to the Windows Update page if you click that link.

3. Now, go to the Windows Update page and select the “Check for Updates” button, and Windows will begin checking for new updates.

4. After Windows has finished searching for updates, simply click the Install Updates button to install them all.

5. You can also choose one of the two alternatives, which will show you a list of available updates as well as a list of optional updates.

6. You will now see a list of updates. By selecting the conversation boxes, you can choose and install any update.

7. If the Windows 11 Upgrade option appears in the list, choose it and then click Install updates.
8. Your Windows 7 will begin the process of upgrading to Windows 11.
You can get the Windows 11 upgrade file from the official website and install it on your computer. However, we will take the easy route.
1. Select the Setting Icon from the Start menu.

2. The settings page for Windows 10 will appear. From the settings page, select the “Updates and Security” option.

3. The page for Windows updates will now open. To check for updates, click the Check for Updates button.

4. Windows will now begin looking for fresh updates.

5. Multiple updates will now be displayed in Windows, and you may choose which one you want to install.

6. If you see Windows 11 upgrade in the list of detected updates, select that file and click Download and Install.
Windows 11 supports 40 distinct languages, which you can choose from when upgrading your current operating system to Windows 11. The languages that are supported are listed below.

We hope you have a good understanding of how to upgrade Windows 10 to Windows 11. We believe you found the process for upgrading Windows 10 to Windows 11 on this page.
In this article, we will show you how to play MODERN WARSHIPS: Sea Battle Online on Windows PC or laptop.
In this article, we will show you how to play The Ghost – Co-op Survival Horror Game on Windows PC or laptop.
TikTok’s growing popularity has made it one of the most popular video-making apps on Google Play and the App Store. It’s popular because it’s simple to use, entertaining, and allows you to express yourself through short, amusing videos.
The software notifies you whenever one of your videos receives a new like or remark. What if you have a favorite TikToker whose updates you can’t miss? You can be notified whenever they make a new post. If this feature isn’t functioning for you, we have a few suggestions.
Notifications are one of the many services and features available on TikTok. Unlike other social media sites, you can choose which activities you want to be notified about and turn off notifications for those you don’t want to hear about.
Let’s start by reviewing TikTok’s notifications:
To begin, make sure your TikTok notifications are turned on. There are a couple of locations to check. We’ll start by showing you how to make sure notifications are turned on in the TikTok app. Then, on your Android or iOS smartphone, we’ll teach you how to make sure they’re turned on.
Follow these instructions to use the TikTok application:
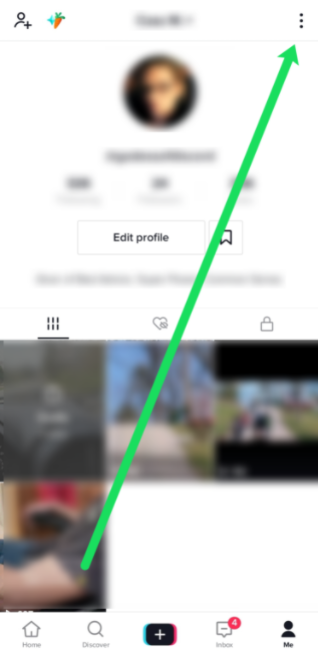
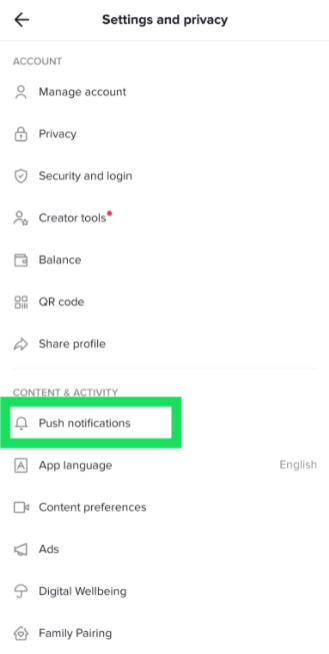
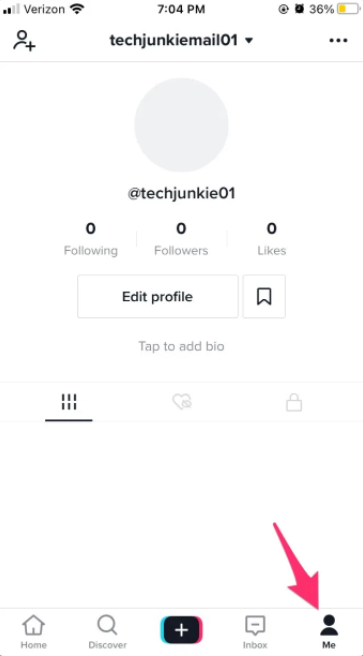
1. In the lower left-hand corner, press on “Me” icon. Then, in the upper right-hand corner, press on the three vertical dots.
2. Press on ‘Push notifications.’
3. Turn on the notifications.

You’ll want to check your phone’s notifications if all of your notifications are turned on. Android users can access the ‘Apps’ option by swiping down from the top of their screen. Then, in TikTok, scroll down and tap on ‘Notifications.’ Check to see if it reads ‘Allowed.’
TikTok notifications may also be viewed in the Settings app for iOS users. After tapping on ‘TikTok,’ go to ‘Notifications.’ Toggle the ‘Allow Notifications’ switch to the green position.
You’ll be notified whenever this user uploads a new video from now on. But what if you enable this functionality and it doesn’t work?
Here are a few alternative solutions.
For pending updates, go to the Google Play Store or the App Store. When you miss a few updates, an app may begin bugging.
Make sure your push notifications are turned on in the app’s notification settings.
Check your phone’s notification settings to determine to see if they allow TikTok to send you notifications.
Move to the desired user’s profile and turn off the post notifications feature, then turn it back on. It could have been a temporary bug. To make sure this feature is working, try it with some other profiles.
In some circumstances, reinstalling the TikTok app can assist. It’s possible that a bug occurred during installation, causing some of the app’s functions to malfunction.
You should be patient if this is the case. Because every feature requires frequent updating, any issues with post notifications or other functionality may only be temporary.

Here’s a brief tip on how to see if your notifications are turned on. Start with the app’s notification settings before moving on to the next step of troubleshooting. Follow these easy steps to get started:
1. On the device, open the TikTok app.
2. In the bottom right corner of the Home screen, press on Me.
3. Press the three-dot icon in the top right corner when you’ve opened your profile.
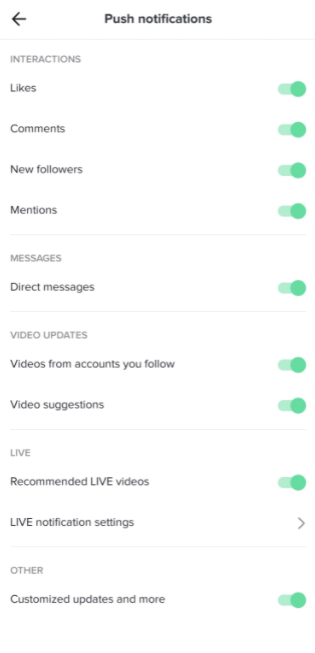
4. Select Push notifications in the General section.
5. Move the toggle for all the interactions you want to receive notifications for. The toggle becomes green when it’s turned on.
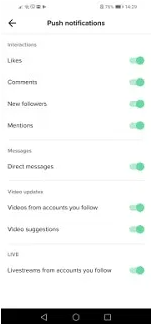
You can select what you want to be notified about in this section, such as new Likes, Comments, Followers, Mentions, Direct Messages, and more.
If you change your mind and want to turn off the notifications, repeat the steps above, but switch the toggle to the opposite side in the final step.
It’s not always the app that’s messing with your notifications; sometimes it’s an issue with your phone. If TikTok notifications are enabled, do the following:
1. Select Settings from your Home screen.
2. Pull to find Apps and press to open.
3. Press on Apps or Manage Apps, depend on which phone you are using
4. Pull to find TikTok on the list or you can type TikTok in the search bar.
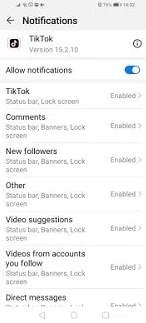
5. Press to open TikTok details and select Notifications.
6. Ensure to flip the toggle button next to Allow notifications to on.
If you don’t want to miss any information from your favorite accounts, post notifications are a valuable function. When they don’t work, it’s inconvenient, but these fixes will help you remedy the problem.
Have you made your favorite video creators’ TikTok post notifications enabled? Are they effective? Let us know what you think in the comments area.
TikTok has developed a massive user base since its inception in 2016. However, as a result, it is becoming increasingly difficult to “trend” on the network. As a result, having many TikTok accounts would be fantastic.
People had been complaining for a long time until the TikTok staff finally listened. Thankfully, you can now have many TikTok accounts. There are a couple caveats, though, which aren’t widely known.
Read on to learn everything there is to know about them, as well as how to create several TikTok accounts without using any third-party programs.
Let’s pretend you don’t have a TikTok account and walk you through the full procedure from scratch. First and foremost, get TikTok for your device from the official app store. Use the Google Play Store if you’re an Android user. Use the App Store instead if you’re using an iPhone. Even if you already have an account, make sure you have the most recent TikTok update. You won’t be able to have numerous accounts if you don’t do so.

Lastly, to log into TikTok (for the first time), follow these instructions:
1. Go to the TikTok app on your phone.
2. In the lower right-hand corner of the home page, tap the button that says Me. This will open the Sign Up window for you.
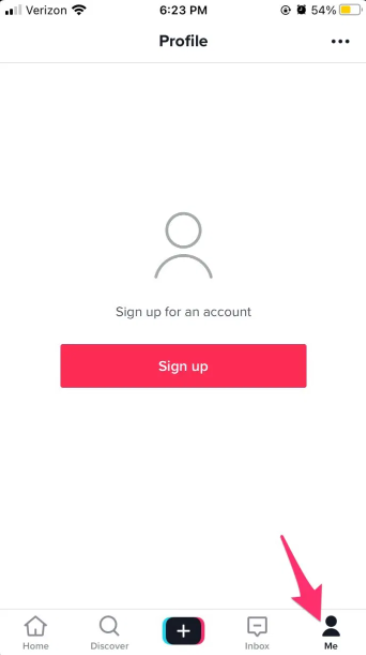
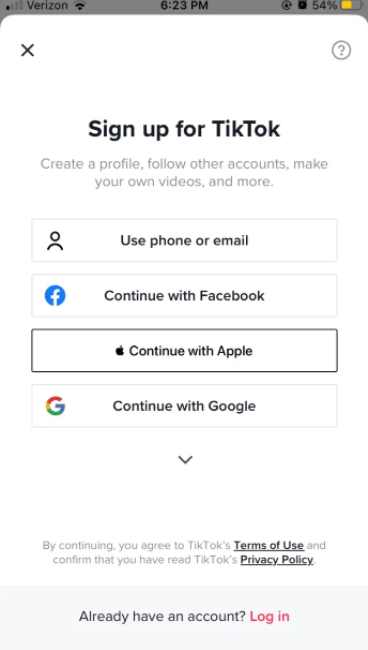
3. At the bottom of the window, choose Sign Up.
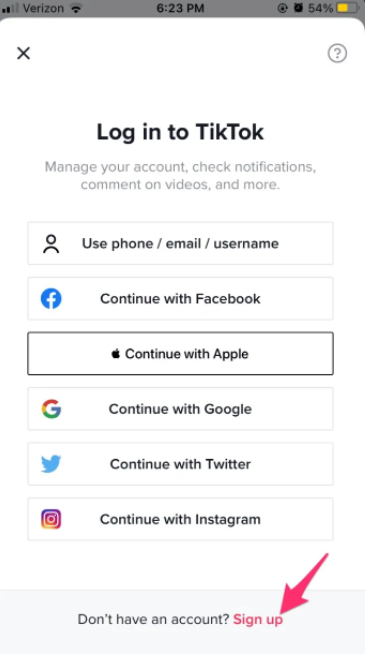
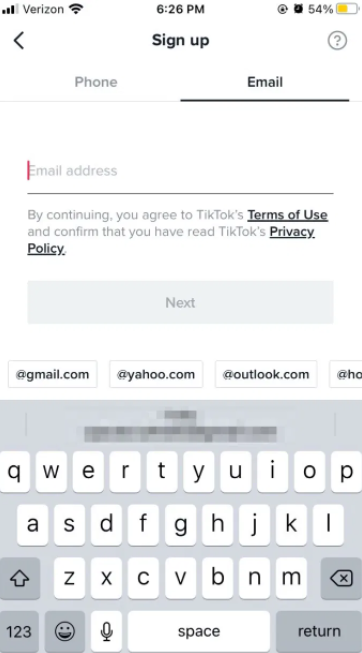
4. You can sign up using your email address, phone number, or any of your social network accounts (Twitter, Instagram, or Facebook). Choose any approach you ưant, but keep in mind your decision. It’ll help you in creating your future account next time.
5. Please provide a valid birthday (you need to be 13 or older).
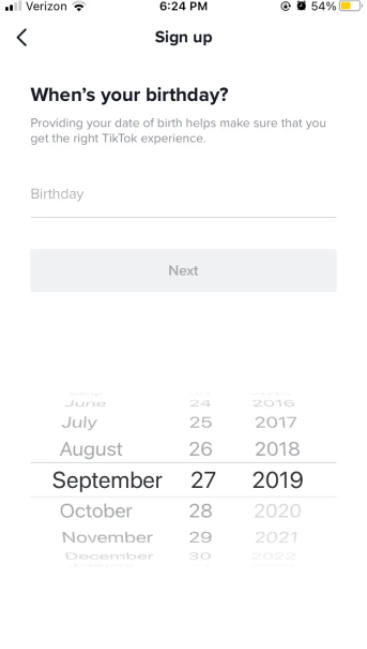
6. Once you’re done, press Next.
7. Verify your account by entering your email or phone number. Check your inbox for an email from TikTok, and click the link to confirm your account. (Or, if you used a phone number, check your SMS for a verification code)
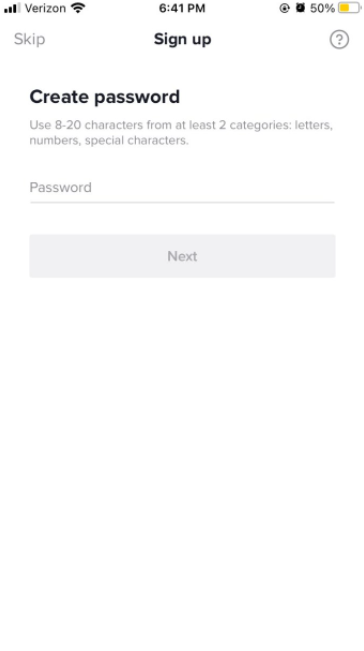
8. Once you’re finished, create a password and confirm the prompt.
9. Lastly, you must complete a simple Captcha to prove that you are a human.
It was simple to create your first account, wasn’t it? Before continuing, make sure you have the most recent version of TikTok if you skipped the first section. When you’re ready, go through the following steps to set up your second TikTok account:
1. Log into your TikTok account (your first account). Simply open the app on your phone and enter your login information. They’ll be saved, and future logins will be automatic.
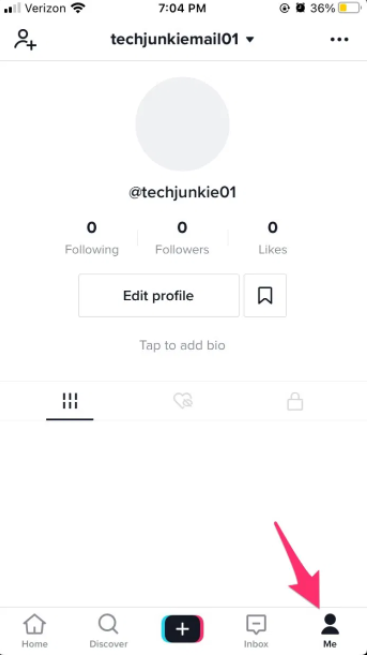
2. In the bottom-right corner of TikTok’s main screen, tap on your profile symbol (Me).
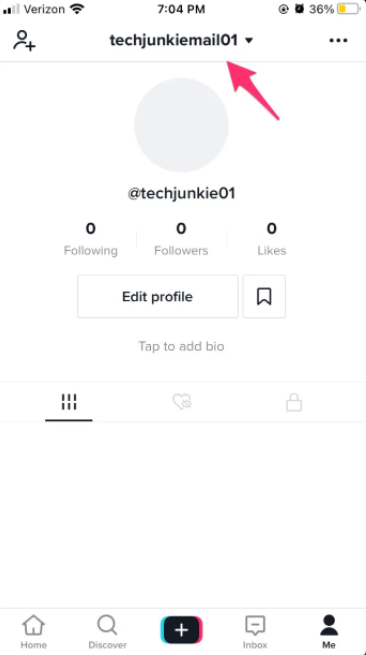
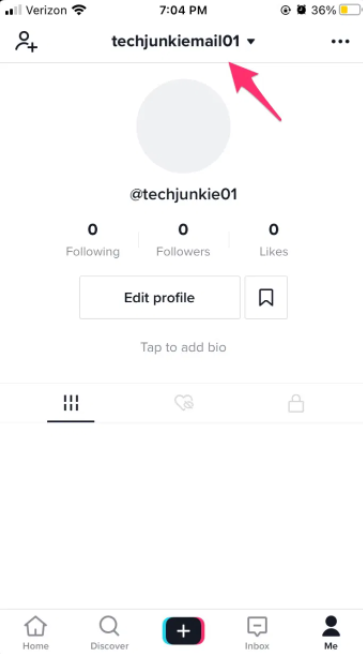
3. In the top center of your screen, press on your account name.
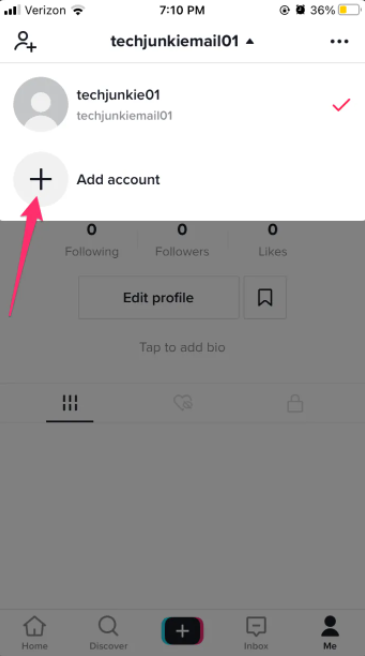
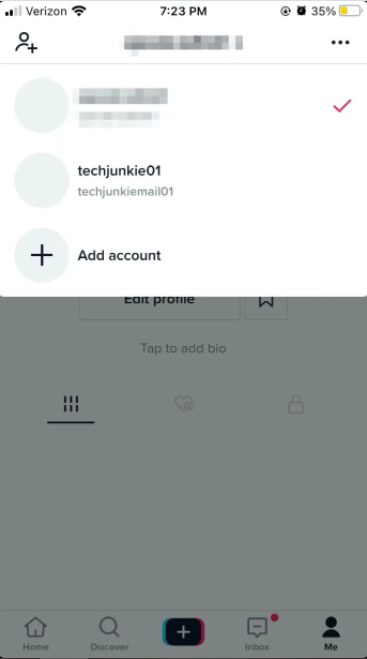
4. To add an account, press the Plus icon.
5. The signup process will remain the same as before. Instructions can be found in the previous section. Now comes the crucial part: make sure you use a different email address or mobile phone number when signing up. It doesn’t really matter how you sign up as long as you don’t use the same information like the last time.
You should now have two TikTok accounts that work on the same device if you followed our advise. As previously stated, don’t use the same phone number or email address, and you’ll be fine. Because you may easily create free email accounts, we recommend using an email to join up for the second time.
The process will be significantly easier if you already have many email accounts. It’s important to note that you can only have five accounts at a time (at the moment of writing).
If you create several accounts on the same device, your profile will be recognized as a business account. This means your account will be deprioritized, which can only be avoided by gaining more traction. If you pay for adverts on your profiles, that won’t happen.
If you don’t run a business or aren’t an entrepreneur, make sure you use numerous devices if you want to create various TikTok profiles (separate accounts on each device).
Lastly, you can use this method to access your additional TikTok accounts. It’s very simple; just follow these steps:
1. Launch TikTok on your device.
2. Press on Me (profile).
3. At the top of the screen, press your account name.
4. This will switch you to a dropdown menu with all your accounts. Choose to which one you want to log in.
5. You can edit your profile to change your username when you log into the other account. To validate your email, hit the three dots in the top-right corner of the page and select Manage Account.
That should suffice to get you up and start with several TikTok accounts.
I Hope, you found this article to be useful and that it supplied you with all of the information you required. Always remember to keep your accounts on distinct phone numbers or email addresses, and if possible, on separate devices.
Do you have a lot of TikTok accounts? Are you utilizing them for pleasure or for work? Please share your thoughts in the comments box.