How to Record Your Screen Using VLC
VLC Media Player offers a lot of features, but did you know it can also record your screen? Here’s how to use VLC to record your desktop.

You may need to record video of your desktop at some point. Perhaps you want to record the steps of a problem you’re having, or you want to capture footage from a favorite game. There is another technique to record your Windows screen without installing anything.
VLC Media Player, the multi-purpose video player, has a different trick is hidden. It is capable of recording your screen without the use of any additional software. This is how it goes.
How to Record Your Screen Using VLC

1. Search VLC Media Player in the Start Menu and open it.
2. On the toolbar, click the Media tab and choose Convert/Save.
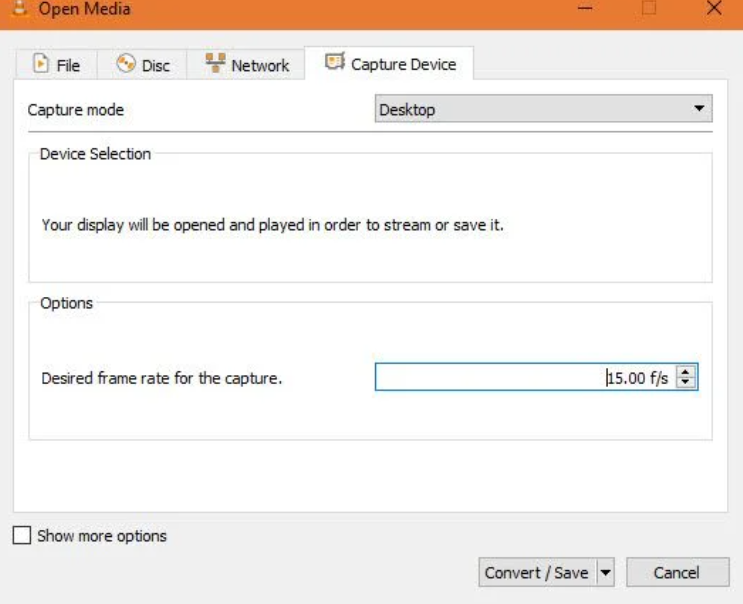
3. Move to the Capture Device tab. Change the Capture mode dropdown box to Desktop here.
4. In the Desired frame rate box, type a number of frames per second. 15FPS should work fine for simple screen recordings. Try 30FPS if you need a high-quality recording. A greater frame rate results in a smoother recording, but it also results in a bigger file size.
5. To enter the next dialog box, click the Convert/Save button.
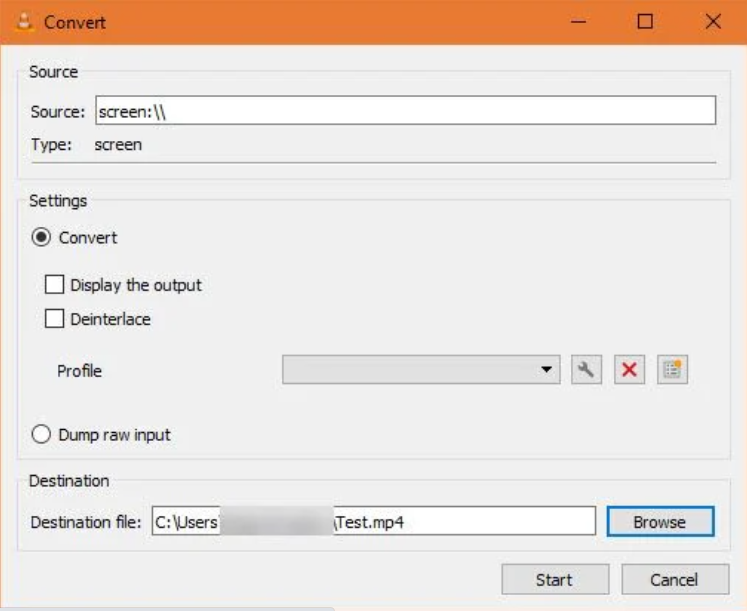
6. Choose a location to save the recording by selecting Browse next to the Destination file box.
7. Once you’ve completed this, click Start to begin the recording. VLC will record anything on the screen without giving you any indication.
8. To stop the recording, press the Stop button on VLC’s interface, and the file will be saved automatically. It will be ready for you in MP4 format at the place you indicated previously.

That’s all there is to make a quick screen recording. VLC doesn’t have all things of specialist recorders, but it’s simple to use in a pinch. You may now share whatever is on your screen at any moment without having to use your phone’s camera!