How to Setup an Android VPN Connection on Your Mobile Device
This article will show you how to connect your Android phone or tablet to a VPN. When you add a VPN to your mobile device, your data and location are always safe, no matter how you connect to the internet. Setting up an Android VPN mobile device protects your privacy from people like online marketers, search giants, your Internet service provider (ISP), and websites that track your browsing habits. Many of the best VPN services online have apps that you can put on your phone. In this guide, we’ll show you how to set up a VPN on your phone without installing any extra apps. Instead, we’ll show you how to use the tools already built into Android OS.
We will use VPNbook‘s free service to connect anonymously and get help with setting up the server. VPNbook is a company that offers both free and paid ways to connect to a virtual private network. We’ll use their free service in this guide. VPNgate is a different kind of service provider. They have many servers in Europe, which may be more useful for some readers.
Configure Android
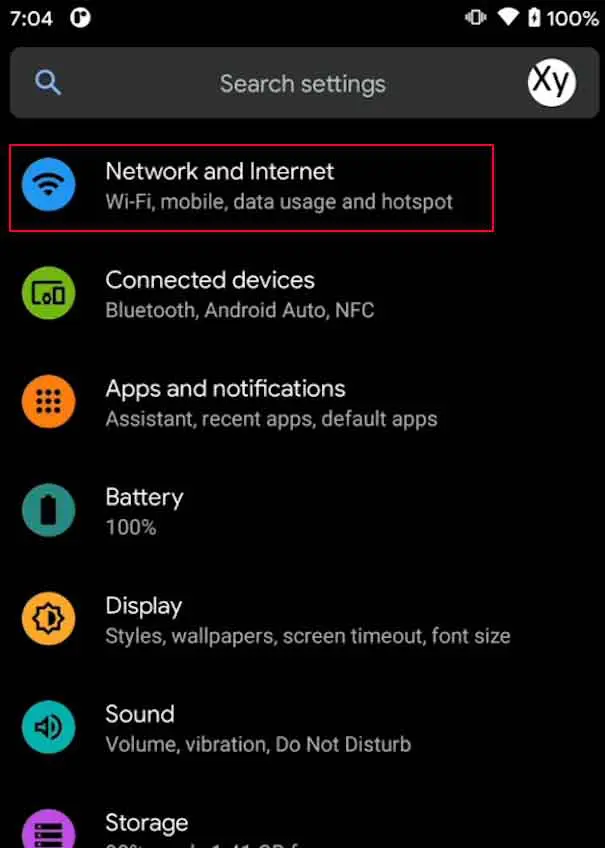
1. First, open Settings.
2. Next, in Settings, select Network and Internet from the menu.

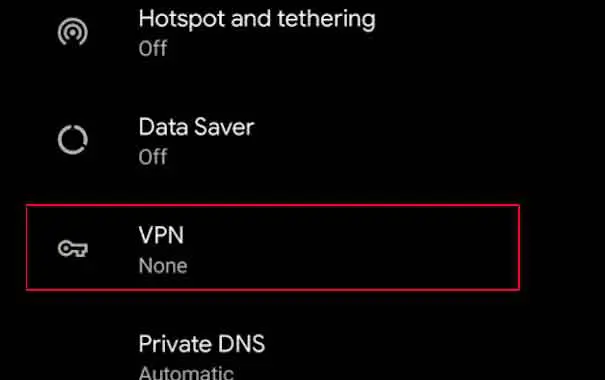
3. Select Advanced at the bottom.

4. In the next menu, choose VPN.

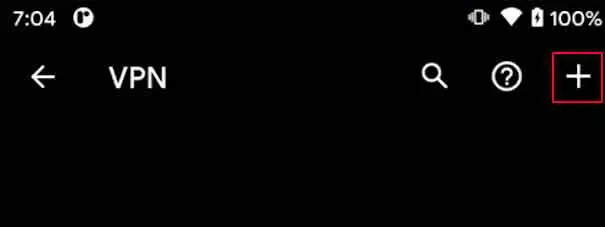
5. Tap the plus (+) icon in the upper right corner.

6. Now, we’ll go to the window where we can edit the VPN profile. Here is where we will put in our VPN information. In this post, we’ll use the login information from VPNBook. You can also use VPN Gate if you want to.
Settings that we’ve made:
Name: VPNbook (you can enter any name you want)
Type: PPTP (required for this connection)
Server: us1.vpnbook.com (select any server from Free PPTP list)
Select PPP encryption (MPPE) below
Username: vpnbook
Password: (user most current password assigned on website)

7. After that, we’ll head back to the VPN settings page. You may see the new VPN account shown in the list.

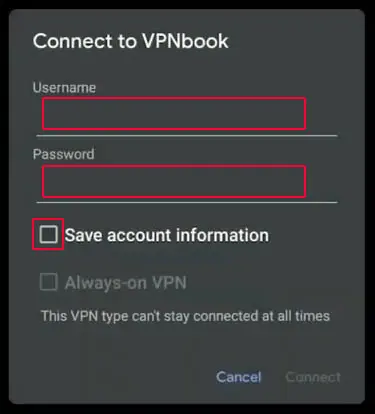
8. You may be asked for your Username and Password if you tap on it. Check save account information to avoid having to re-enter user information in the future. At the bottom, click Connect.

On your VPN menu, you’ll see the status of ‘Connected’ under your username when you finish the process. Once you’ve closed the VPN window, you’ll be able to browse the web and use online tools without fear of being tracked or intercepted.
You can disconnect the service by returning to the VPN settings window (step 7) and selecting disconnect. The wheel icon to the right of the window can be clicked to remove it completely if no longer required.
See more:
Here’s a link to our YouTube tutorial if you’d like to see a visual representation of the preceding steps.
That’s about it.