How to set up a VPN on Android, Windows, and other platforms
How to set up a VPN on Android, Windows, and other platforms
Are you trying to set up a VPN account on your phone or tablet? It’s honestly not that difficult. We’ll take you step by step through the procedure!
As we do more online, especially now when practically everyone is stuck at home, it’s more critical than ever to keep your activities secure and confidential. Some of these issues can be addressed with the use of a reliable VPN (virtual private network). Want to set up a virtual private network (VPN) on your phone, laptop, or tablet? Here’s how to do it.
Set up a VPN on Android smartphones
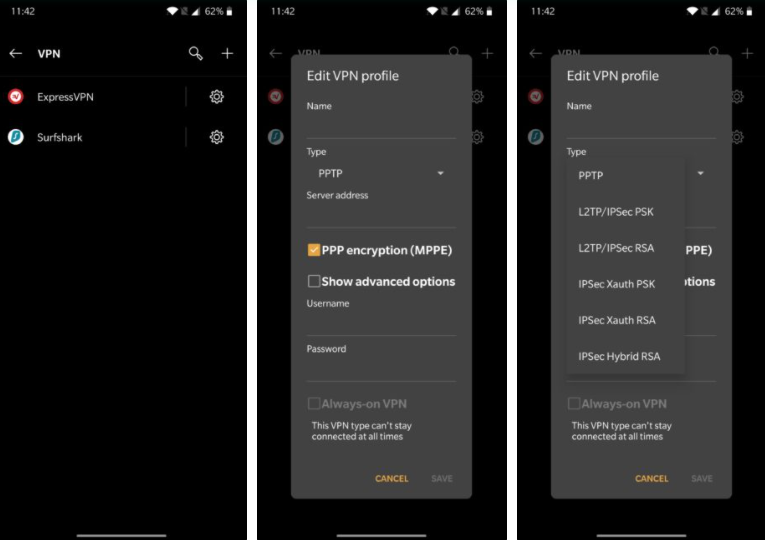
Because VPN support is built into Android, you can easily set it up without having to download an app from the phone’s Settings menu.
How to manually set up a VPN on Android
1. Open the phone’s Settings menu. Keep in mind that the steps below may differ based on the device you’re using.
2. Select Wi-Fi & Internet or Wireless & Networks. Navigate to the network settings page.
3. Select VPN. On some smartphones, you may need to touch More first to broaden the selections.
4. In the top right corner, tap the + sign. If you don’t see one, go to the advanced options menu and look for it (usually by tapping on the three vertical dots icon).
5. Fill in the required details, such as the server address, username, and password. The network administrator will give you with this information.
How to manually connect to OpenVPN networks on Android
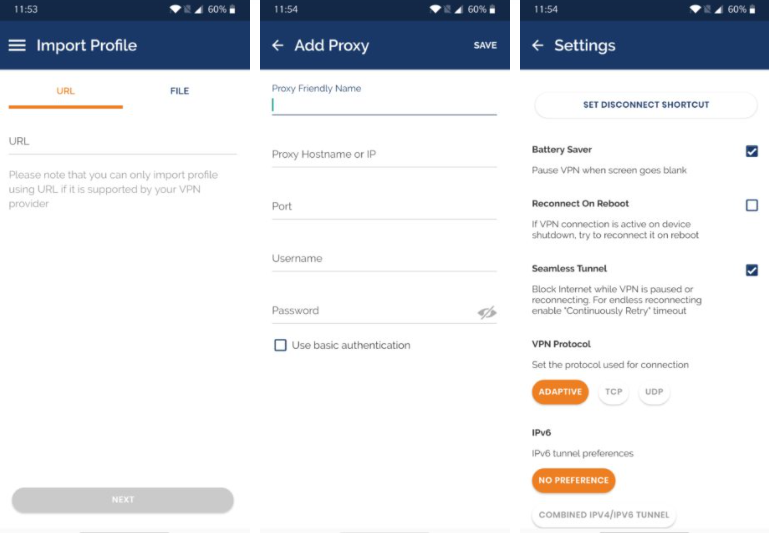
An Android phone’s built-in VPN capability supports PPTP, L2TP, and IPSec protocols. None of them are really secure, and PPTP in particular is quite old. If you absolutely must, or if the OpenVPN protocol isn’t available for the private network you want to connect to, use this method.
1. You’ll have to use a third-party program like OpenVPN Connect to connect to OpenVPN. OpenVPN’s official app is compatible with any Android device running version 4.1 or higher.
2. The Google Play Store is where you can get the app. The essential information should be provided by your network administrator. You can import a profile from a URL or from a.ovpn file on your phone using the app.
3. A proxy connection can also be added manually.
4. You can choose the protocol, enable a kill switch (called Seamless Tunnel), and set up a power saver mode in the settings area.
Set up a VPN on Apple devices
VPNs can be set up directly on all iPhones, iPads, and Macs. On macOS, you’ll need to do a few extra steps, but it’s simple on iOS.
How to manually set up a VPN on iOS
1. Unlock your iPhone or iPad and launch Settings.
2. Press on General and choose VPN.
3. Press on Add VPN Configuration.
4. The essential information will be provided by your network administrator. The VPN protocol, VPN settings (remote ID, server), and authentication login information are all included.
5. To save the profile, tap Done once it’s finished.
6. Using the slider toggle on the VPN tab, you can now enable or disable the VPN connection.
Manually setting up a VPN on macOS
1. Tap on the Apple menu (Apple icon) and navigate to System preferences > Network.
2. Tap on the “+” icon.
3. Select VPN on the Interface menu that pops up.
You’ll need to go over each area and fill in the blanks with the necessary information.
1. First, choose VPN Type, then VPN Protocol, give it a name, and then choose Create.
2. The server address, authentication and login information, as well as any additional settings that the network administrator might have.
3. Choose Apply, then choose OK.
4. Launch System Preferences > Network, tap on the VPN service name and tap on Connect to connect to the VPN.
5. You might choose Show VPN status in the menu bar and use the status icon to connect to the VPN network quickly also.
How to set up a VPN on Windows 10
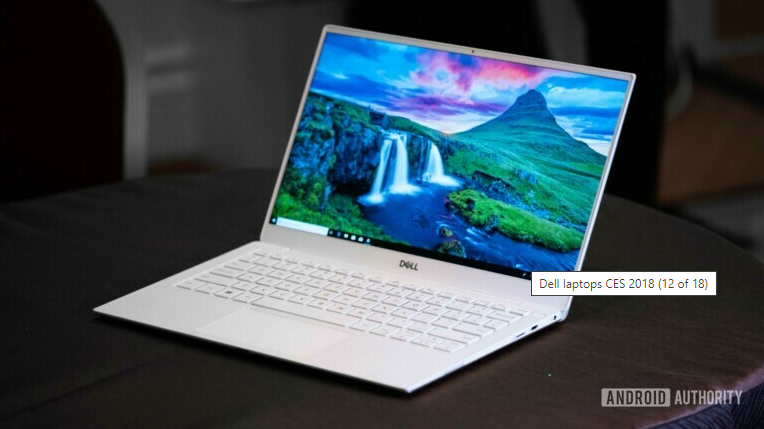
Before you can quickly and simply connect to a VPN on Windows 10, you’ll need to create a VPN profile.
Manually set up a VPN on Windows 10
1. Launch Settings > Network & Internet and choose VPN.
2. You might tap on the Windows 10 search bar and enter VPN, and choose VPN Settings also.
3. Tap on Add a VPN connection.
4. Fill up the rest of the form using the network administrator’s information and change the VPN Provider section to Windows (built-in).
5. In the Wi-Fi area, the VPN is now available. Select the created VPN connection by clicking on the Wi-Fi icon in the system tray.
Setting up a VPN on Chrome OS

On Chrome OS, Google has made it quite simple to set up a VPN. The only other alternative is to use a VPN provider that includes a Chrome browser extension, but there aren’t many.
How to set up a VPN on Chrome OS
1. Tap on your account photo in the bottom-right corner of the screen.
2. Go to Settings and choose Add connection in the Network section.
3. Choose Add OpenVPN/L2TP.
4. Enter the info required into the form that pops up and choose Connect.
Before you can manually set up a VPN, you may need to install server and user certificates. The network administrator or VPN provider should have all of the necessary information.
Get a VPN service!
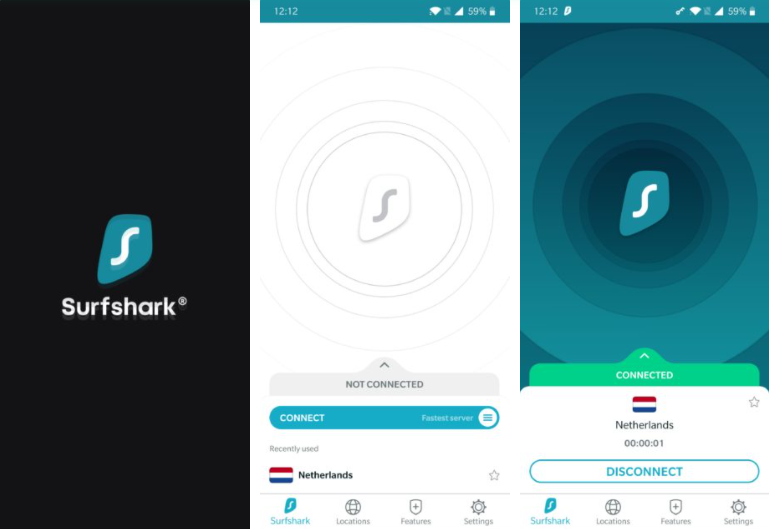
Everything discussed above is for anyone working remotely who wants to connect to a business VPN network. If you’re looking for a VPN for personal use, signing up for a third-party VPN is the simplest solution.
These companies work with a variety of devices and platforms. The apps are simple to set up and use, making them a delight to use. After you’ve signed up, all you have to do now is download the appropriate app and you’re ready to begin.
Our VPN recommendations

ExpressVPN comes highly recommended by me. It’s one of the most user-friendly VPNs available, with compatibility for a variety of platforms and devices as well as fast connection speeds. It is, however, on the more pricey side, which not everyone will like.
NordVPN is just as good as ExpressVPN. In reality, it has a number of things working in its favor. Nord has a large number of servers and a variety of additional security mechanisms. It is also incredibly affordable due to its long-term ambitions. However, I found the connection speeds to be faster with ExpressVPN. Although your experience may vary, you can’t go wrong with either of these solutions.
Another popular choice is Cyberghost, which is ideal for individuals who wish to eliminate the guesswork out of it. It simplifies things by categorizing everything into modes and categories. Positives include a large number of servers, excellent security features such as virus filtering, and a cheap price tag. Although connection speeds were a concern, that’s also improved time.
More services, such as BullGuard, SaferVPN, StrongVPN, PureVPN, VPN Unlimited, and IPVanish, have also been reviewed. Many more are in the works, including one about which I’ve only heard wonderful things – SurfShark.