How to Reinstall Microsoft OneDrive on Windows 10

In this tutorial, learn how to reinstall Microsoft OneDrive on Windows 10. Here is how you can do it easily without having to redownload the installer from Microsoft.
Microsoft’s OneDrive online storage service has been pretty solid over the years. However, it can sometimes hit a snag or two. Fortunately, there’s a simple method to reinstall OneDrive without downloading the installer again. Windows 10 includes a built-in copy of the installer for OneDrive that you can launch right away without waiting for a download. Here are the steps:

OneDriver for Windows 10
If OneDrive stops working, you can download OneDrive directly from this source but there’s an easier way.
How to Reinstall Microsoft OneDrive on Windows 10
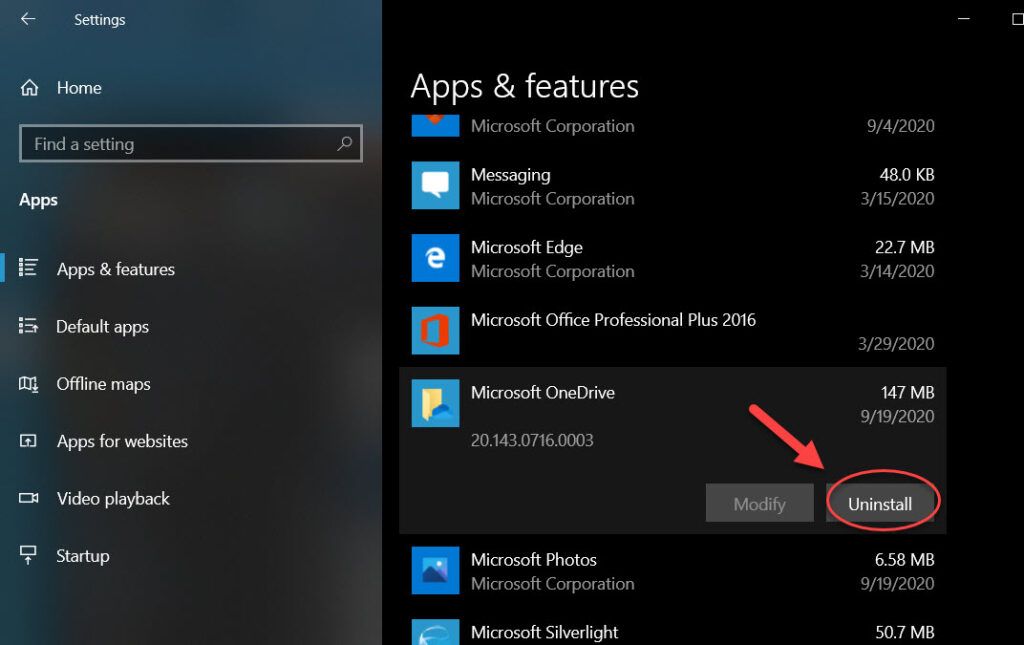
1. First, uninstall OneDrive. To do that, open Start > Settings > Apps > Apps & features. Find Microsoft OneDrive, select it then click Uninstall.

2. Restart your computer.
3. Open This PC.
4. Open the system drive where Windows 10 is installed (usually C:\).
5. Go to the Windows folder and then open the WinSxS folder.
6. In the search box, type onedrive then wait until the OneDriveSetup setup file occurs.

7. Once you find it, double-click it to begin setup and you should be on your way to reinstalling OneDrive.
Thus, if you ever face a problem with OneDrive not working properly, you know what to do.
Hope something helps you. Let us know in the comments.