How to Make Facebook Private
How to Make Facebook Private
What to Know:
Open Settings & Privacy > Settings > Privacy. Under Who Can See Your Posts, alter Public to Friends, or another selection.
Launch Privacy > Who can see your friends list and pick Friends or Only Me to make your Friends list private.
Go to your profile page and select Edit Details to make your profile private. Toggle off the information you don’t want others to see.
This post shows how to make your Facebook posts, Friends list, profile information, and albums private by changing your Facebook settings. The instructions are specific to the desktop version of Facebook.
How to Change the Sharing Default Using Privacy Settings and Tools
Setting your default sharing choice to Friends rather than Public is an easy method to lock down whatever you share in the future. Only your friends will see your posts after you make this adjustment.
Follow these steps to access the Facebook Privacy Settings and Tools screen:
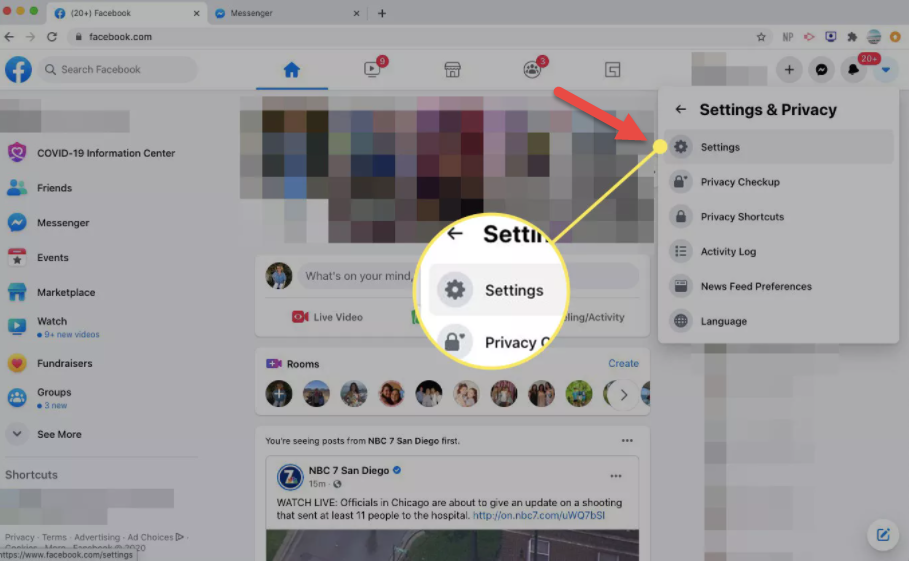
1. On any Facebook screen, choose the arrow in the upper-right corner.

2. In the drop-down menu, choose Settings & Privacy.

3. Select Settings.

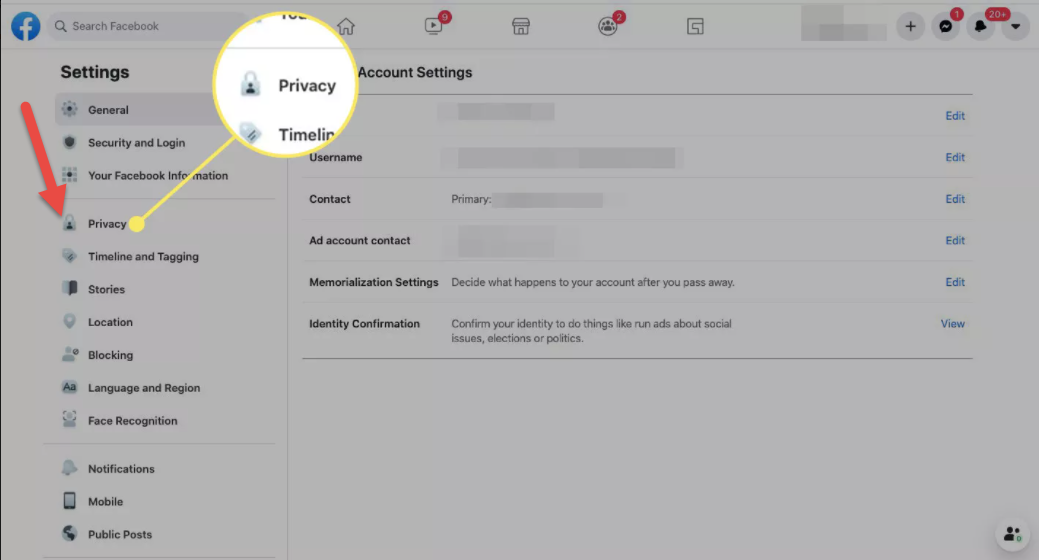
4. In the left pane, click Privacy.

5. Who can see your future posts is the first thing on the list. Choose Edit and select Friends from the drop-down menu if it says Public.

6. Choose Close to save the modification.
7. On this web, you can also modify the audience for prior postings. Look for the option labeled Limit the audience for posts you’ve shared with friends of friends or Public. Choose Limit Past Posts, then choose Limit Past Posts again.
Note: Previous posts were set to Friends of Friends or Public postings will now be marked as Friends with this setting. On individual posts, you may always modify the default privacy level.

How to Make Your Facebook Friends List Private
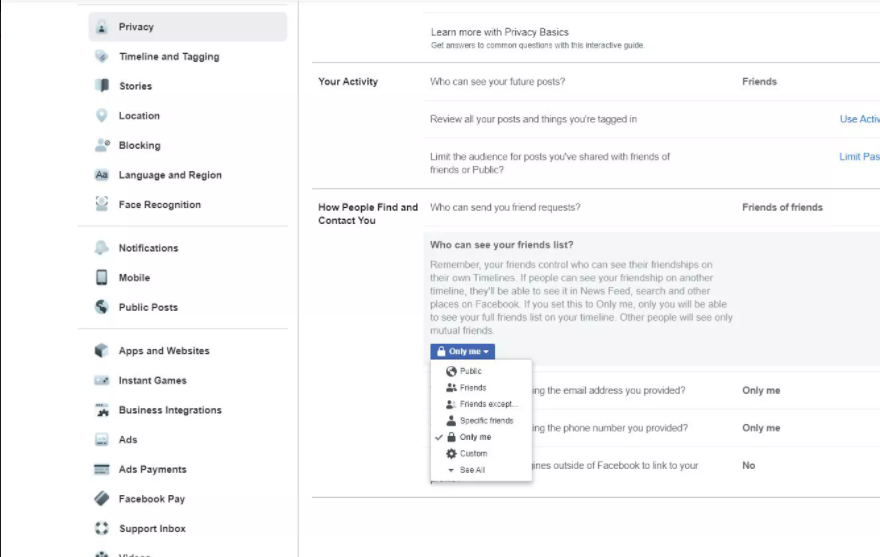
Facebook makes your friends list public by default, which means anyone can view it, whether they’re friends with you or not. You may modify your options using Facebook’s settings or your profile page.
1. Choose Edit next to Who can see your friends list on the Settings and Privacy screen.

2. To keep your friends list private, choose either Friends or Only me.
Note: You may also choose Specific Friends or Friends Except to limit who can access your friends list. Specific Friends is a list of persons you specify, whereas Friends Except excludes specific people on your list.
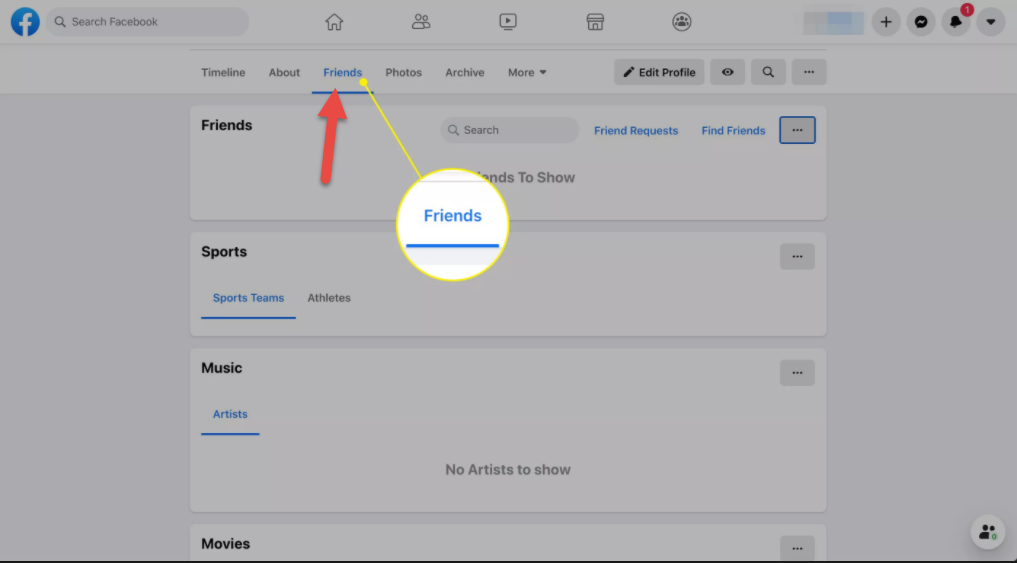
3. Go to your Facebook profile page instead. Under your cover photo, open the Friends tab.
Tip: To get to your profile page, choose your name from any Facebook page.
4. Choose Edit Privacy from the three-dot menu in the upper-right corner of the Friends page.
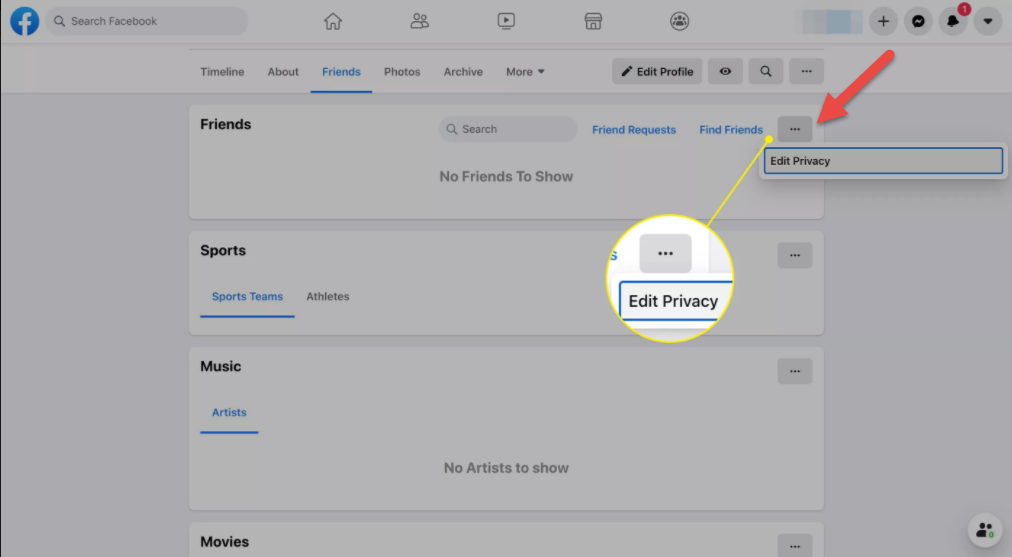
5. Choose an audience next to Friends List and Following.
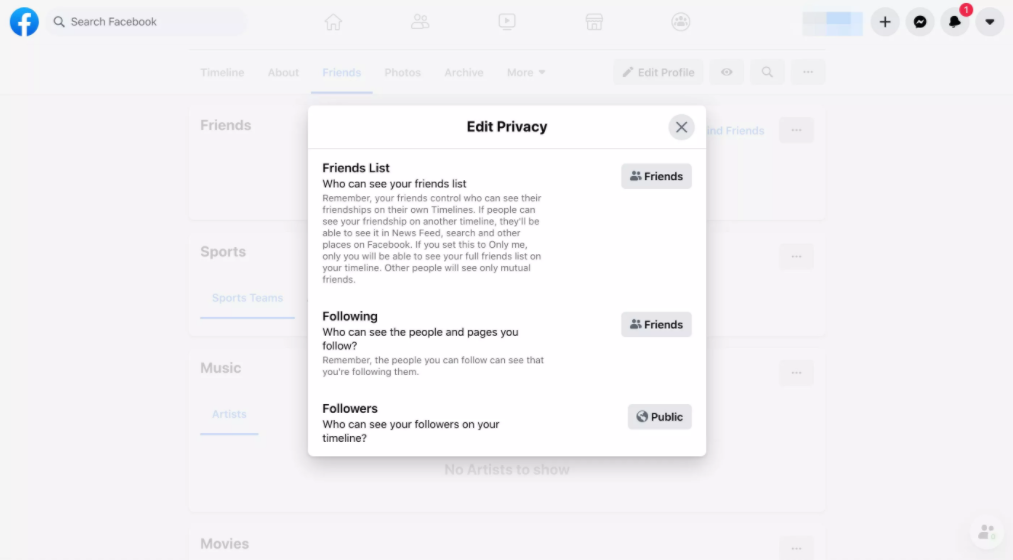
6. To save the changes and close the window, tap X icon.
How to Review Your Profile Privacy Settings
By default, your Facebook profile is set to public, which means it is searchable and indexed by Google and other search engines as well as seeable by anyone.
Privacy experts advise that you go over each item in your profile’s profile settings.
1. To access your profile, click your name at the top of any Facebook tab.
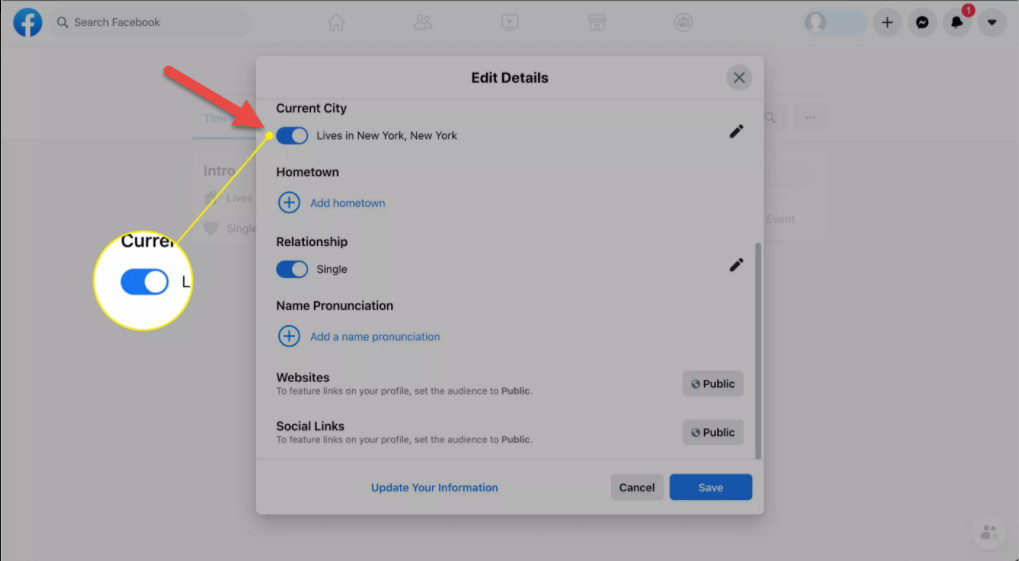
2. In the left pane of your profile page, click Edit Details. The box labeled “Customize Your Intro” appears.

3. Select the toggle next to the information you want to keep private and turn it off. This includes the boxes adjacent to education, current city, hometown, and other personal information you’ve shared on Facebook.
Tip: Alternatively, choose the pencil icon to edit an item.
HOW TO MAKE YOUR PROFILE INVISIBLE TO SEARCH ENGINES
You have the option of blocking your profile from appearing in search engines. Following these steps if you want to do:
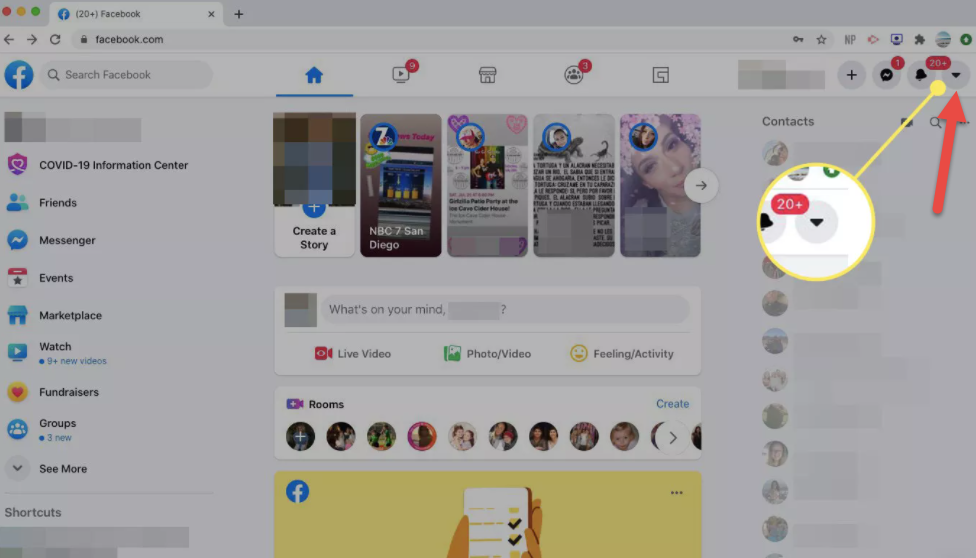
1. From any Facebook tab, choose the arrow in the upper-right corner.
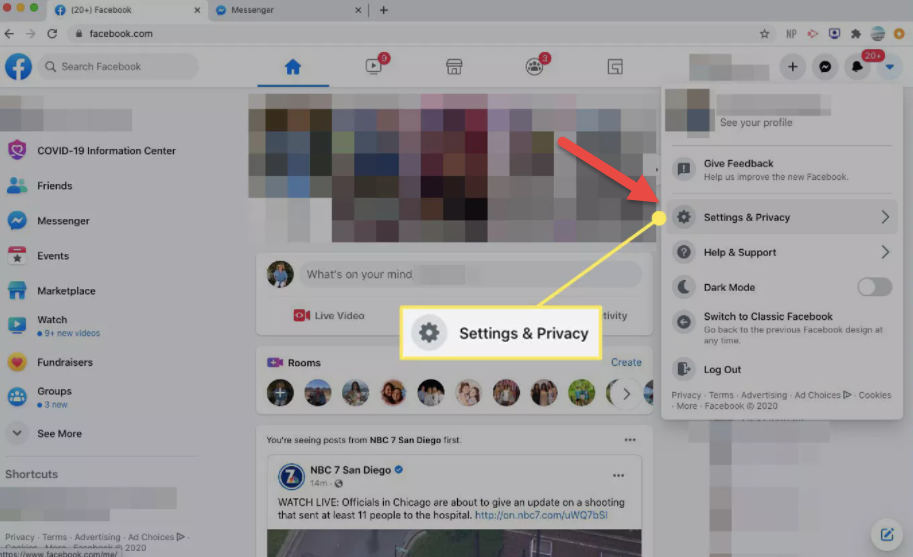
2. Choose Settings & Privacy in the drop-down menu.
3. Choose Settings.
4. Choose Privacy in the left pane.
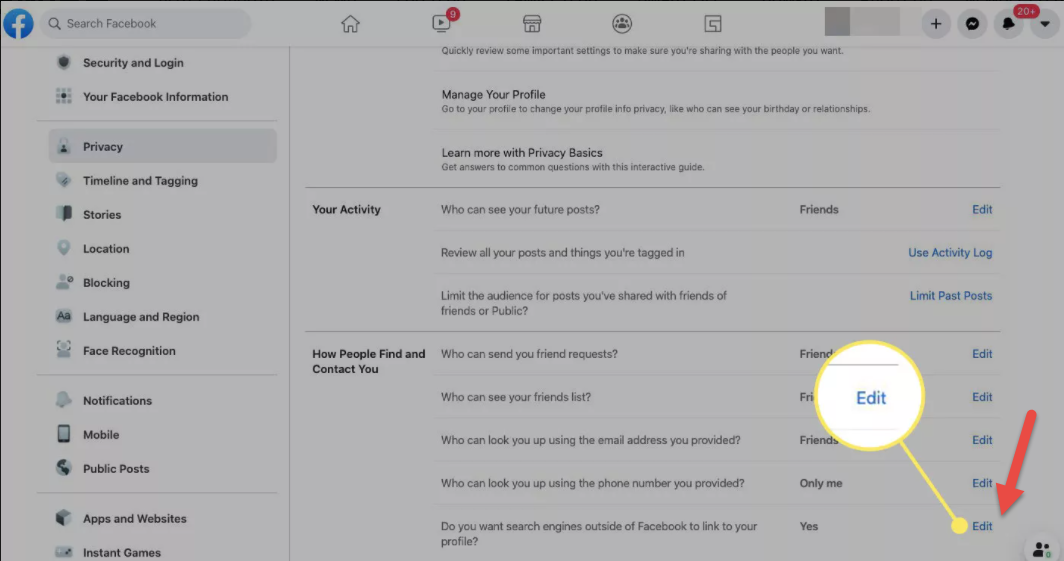
5. Besides Do you want search engines outside of Facebook to link to your profile, choose Edit and uncheck the option allowing search engines to see your Facebook profile.
How to Use Facebook’s Inline Audience Selector
For each piece of content you publish on Facebook, you may use audience selectors to define different sharing choices.
When you open a status screen to publish something, the privacy setting you chose to be the default appears at the bottom of the screen. You might want to modify this now and then.
Choose an audience for a given post by clicking the button with the privacy setting in the status box. The selection consists of Public, Friends, and Only Me, Friends except, and Specific friends.
Write your post and then select Post to send it to the new audience you’ve chosen.
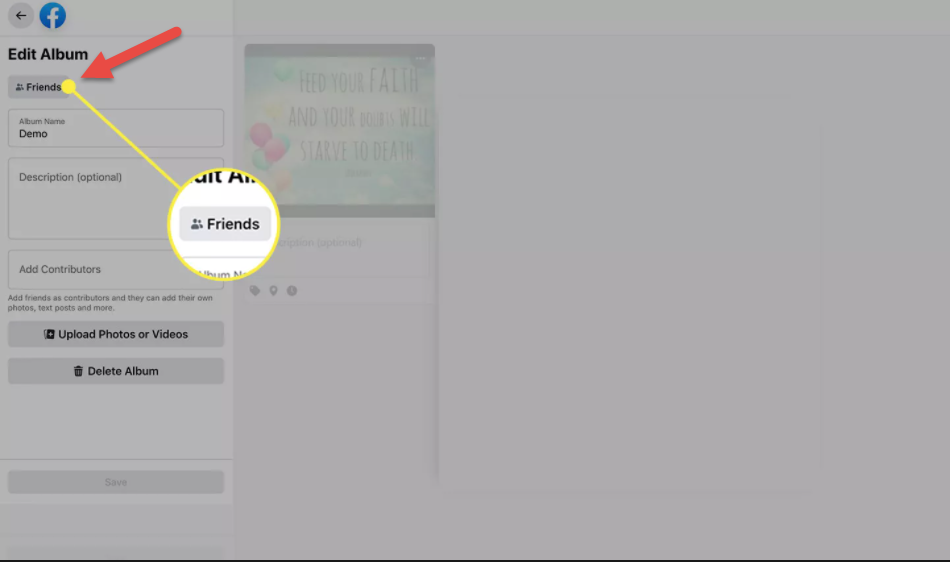
Change Privacy Settings on Photo Albums
You can alter the photo privacy settings by album or individual image when uploading images to Facebook.
Here’s how to change the privacy settings for a photo album:
1. Open your profile and tap Photos.
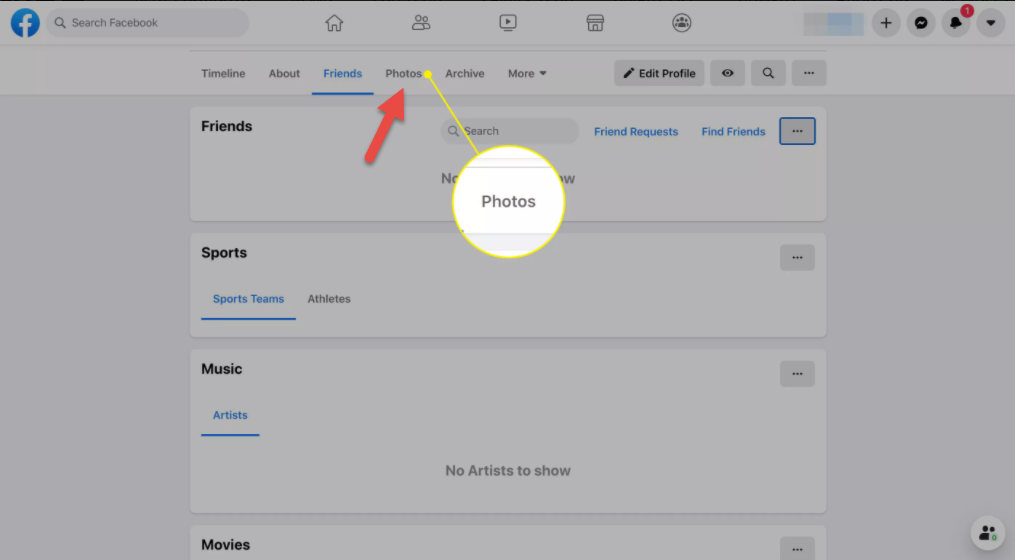
2. Choose the More menu beside the album you’d like to change and tap Edit album.
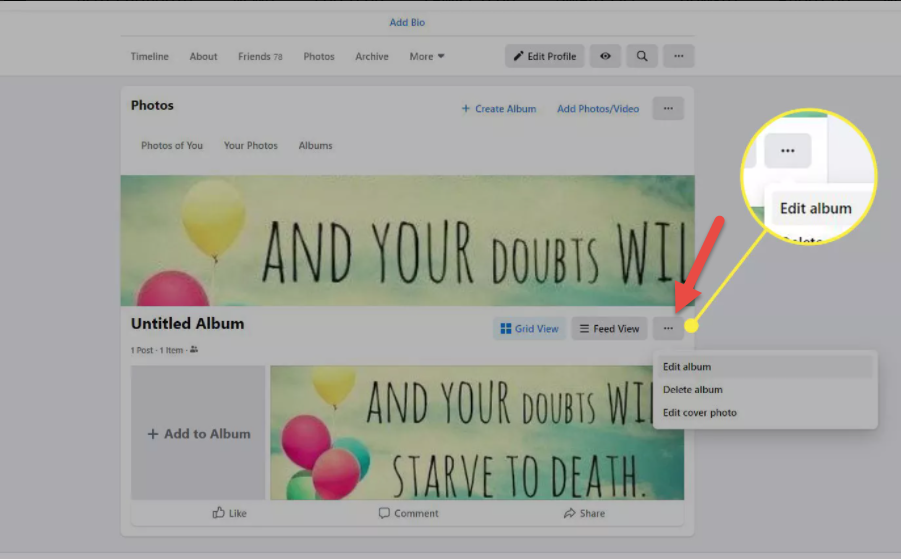
3. Set the album’s privacy setting using the audience selector.
Note: A few albums have audience selectors for each photo, allowing you to choose a different audience for each shot.
