How to Use Android Without Google: Everything You Need to Know

How to Use Android Without Google: Everything You Need to Know

Want to utilize Android without having to rely on Google? Here’s a step-by-step guide to ditching Google on your Android device and reclaiming your privacy.

I’ve made a significant change in the way I use my phone in the last few years. I’ve opted to use Android without a Google account.

Is it possible to do so? Giving up and refusing Google is, as it turns out, doable, and the experience isn’t nearly as unpleasant as you might assume.

This is a list of what I can still accomplish on Android without using any of Google’s services, including Google Play Services, as well as what I’ve had to give up.

Why Use Android Without Google?

Only a small percentage of the population is prepared to give up access to the Play Store and Google’s app suite. You could, however, be one of them. Perhaps you’d like to completely eliminate Google from your life. There are a variety of reasons why you would wish to use an Android phone without Google; here are a few of the most important.

1. Google Has Gotten Out of Hand

When I first started using Google, it was just for the purpose of conducting searches. Then it evolved into a method of managing email, which evolved into a platform for instant chatting. Later, Google evolved into a map-viewing tool, and then into a GPS substitute that guided me about town. It also became a location for writing documents and storing files.

Google became a means for me to navigate the web and keep track of all the pages I visited. Then it evolved into a tool for downloading and managing apps, tracking Android devices, and remotely wiping them. On Android, search evolved into Google Now, which evolved into Google Assistant, a digital assistant that makes use of what Google knows about us based on our behavior.

I’m not opposed to sharing any of this information with a firm, but sharing it all with one seems excessive. This brings us to the following point.

2. You Want to Increase Your Privacy

Every Android device that comes with the Play Store has Google Play Services running in the background. This allows Google to conduct a variety of functions, such as remotely installing programs and retrieving your location. These services also make some of that functionality available to third-party apps.

By using Android without logging into a Google account, you can limit the amount of information you give over. However, it will not transform your device into a ghost overnight. Mobile phones are naturally trackable due to the act of pinging and connecting to cell towers. However, making this modification limits the amount of data you generate and share.

3. You Like Open Source

Although Android is an open source operating system, the majority of the software we use on our smartphones is not. If you’ve ever wanted to use purely open source components, replacing your phone’s default firmware with a custom ROM is the simplest solution.

You’ll know you’re getting Google’s contributions to the Android Open Source Project this way. Sure, some proprietary pieces are required for your phone’s radios and sensors to function, but many of us make the same compromise when installing Linux on our PCs.

Because it’s difficult to tell which apps in the Play Store are open source, avoiding it completely reduces your chances of installing closed-source software. You’ll still need to get programs from somewhere, but we’ll get to that later.

Why Shouldn’t You Go Google-Free?

You’re intrigued about using an Android phone that isn’t made by Google. But hang in there. Here are a few reasons why you should practice restraint.

1. You May Have to Give Up a Lot of Apps

You might not be able to use much of what you’ve come to rely on right now. When you say goodbye to Google, you’re saying goodbye to a slew of Android apps.

This is even more pronounced if you take it a step further and utilize entirely open source software, as I did. Say goodbye to social media, music streaming services, popular games, the majority of navigation tools, cloud storage providers, video streaming sites, and a variety of productivity applications.

There are open source equivalents to some of these programs, but if you want to go 100% open source, you’ll miss out on a lot.

2. Slower Updates

Alternative app stores may offer access to a large number of programs that aren’t available on Google Play, but updates aren’t as frequent. Some of these sources fall behind by weeks or months.

This isn’t just about missing out on the most recent features.

3. Security Risks

Slow updates can expose you to known security flaws. However, that isn’t the main security danger you expose yourself to. The most common technique to hack a device is to unwittingly install malicious software. Using a third-party app store implies allowing your smartphone to install software from sources other than the Google Play Store, making you vulnerable to such attacks.

Regrettably, this is a trade-off you must weigh for yourself. Do you trust the extra security that comes with only installing apps from the Google Play Store? Or do you buy your apps from somewhere else and risk receiving something that hasn’t been thoroughly vetted?

What Apps Can You Use Out of the Box?

Our cellphones are capable of a great deal even without the installation of a single app. Without the need for additional software, you can make calls, send text messages, snap photos, keep a calendar, listen to music, do math problems, take notes, and surf the web.

This is already more than feature phones can do, and let’s face it, millions of people still use them without them having a negative impact on their life. Stop there. You can transform your Android phone into a sophisticated dumbphone.

The manufacturer determines how useful your phone will be right out of the box. Samsung phones come with a variety of pre-installed apps that are only available on Samsung phones. These apps will continue to function even if your phone is not connected to a Google account.

The situation is a little more difficult on a Pixel device because these phones come preloaded with Google software. Even if you uninstall all the apps that require a Google account to work, some functions in the remaining apps will be lost.

The dialer app, for example, continues to function normally, but it no longer automatically pulls down contacts, and you can only access numbers that have been stored on your device. The camera app takes pictures, but it doesn’t offer to back them up to Google Photos automatically. YouTube Music only plays files that have been downloaded locally.

To be honest, I was unconcerned with the situation. I still buy CDs and store my music locally, despite the widespread availability of music streaming services. Even though I have access to cloud services, I still back up a lot of my information to hard disks. I decline to sync my browsing history and tabs when offered the option.

These are all behaviors I developed as a result of limited data plans, patchy coverage, inconsistent access to a stable internet connection, and apprehension about entrusting personal data to organizations. I say this to emphasize that there may be other advantages to giving up Google that I simply did not consider because of how I use my phone.

To continue accomplishing what I expected from a smartphone, I needed more apps than this.

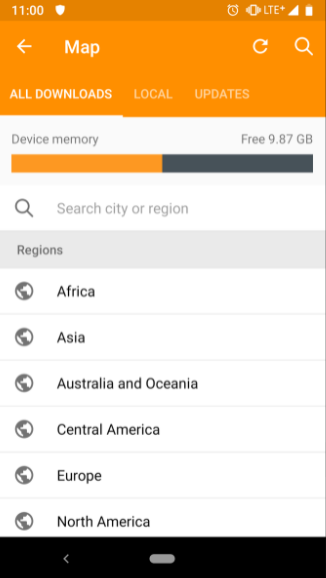
How Do You Get More Apps Without Google?

There are a few different Android app shops to choose from, but I’ll only go through a few. Depending on why you’re using Android without a Google account, you’ll favor one over the other.

F-Droid

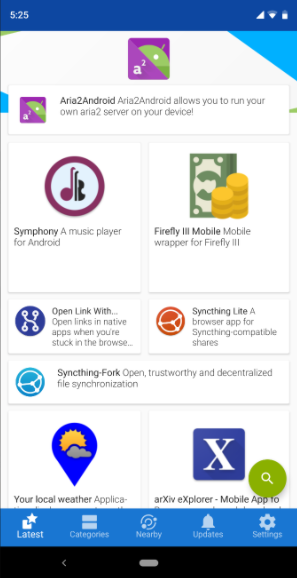
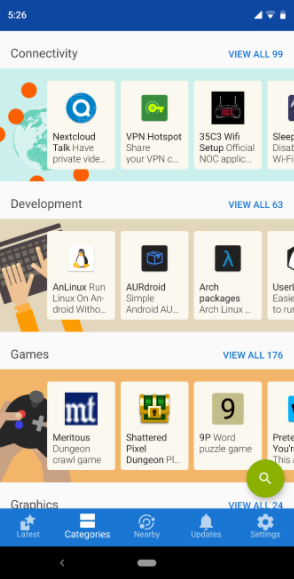
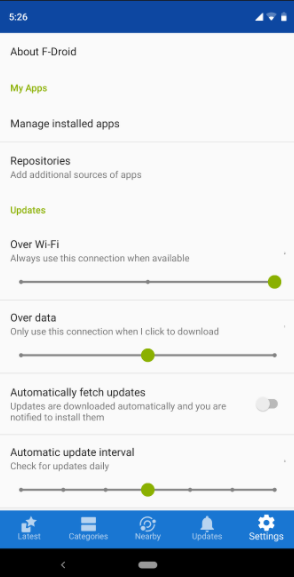
I didn’t choose to use a smartphone that didn’t have Google. In addition, I wanted to use only open source software. As a result, I installed F-Droid, a sort of app store that exclusively carries free and open source apps. It may feel more like a software repository to Linux users. The service keeps track of new programs and allows you to go back to previous versions if necessary.

F-Droid has over a thousand apps, and I’ve found that I can get by with just that. On the other hand, I don’t use my phone to play games or peruse social media. Those that do will not be able to locate what they are looking for here.

Download: F-Droid (Free)

Amazon Appstore

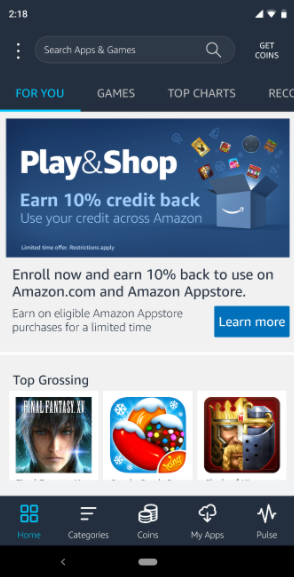
Since its launch in 2011, the Amazon Appstore has grown to over 300,000 apps. If you don’t trust Google but still want your software distributed by a well-known company, Amazon could be the answer. This is the primary app store on Amazon Fire tablets, and it has a wide enough selection to satisfy people that purchase them.

Although Google software is not available on the Appstore, you should have no trouble finding alternatives. Apps from the major social networks are also available. However, I don’t see how switching from Google to Amazon is much better for those concerned about their privacy.

Download: Amazon Appstore (Free)

Other Google Play Alternatives

There are a few other Google Play options besides F-Droid and the Amazon Appstore. If you own a Samsung device, you might want to check out the Aurora Store, an open source Play Store client that can be used anonymously, or Samsung’s app store.

Download Apps Directly From Your Browser

Though purchasing software from an app store is the preferred method, you may also download programs straight from websites. This is dangerous, so be cautious about which websites you trust.

The disadvantage of this method is that you will not receive automated updates, which is a security risk. I’d recommend this as a last resort for those must-have apps that aren’t available outside of the Play Store.

Replacing Must-Have Android Features

Yes, a smartphone is already quite intelligent, but there are some advantages that many of us are unwilling to forego. This category will vary depending on what you put in it, but these are the categories where I had to look for good options.

Search and Web Browsing

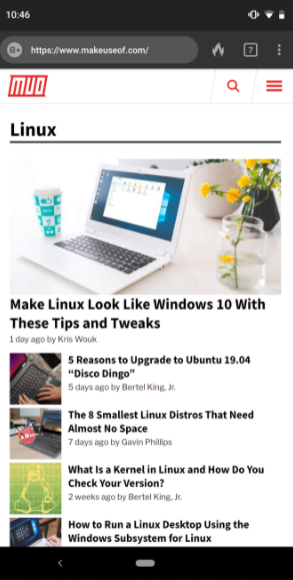
I don’t use my phone to access the internet very much. When I do use a web browser, it’s usually to look for information. So I was overjoyed to discover that DuckDuckGo, the non-tracking search engine, has an Android app that merges the two experiences into one.

You may do searches and view the results in the same location. You may also place a widget where Google would normally appear at the top of your home screen.

If you use Wikipedia for half of your queries, you should get its Android app. This method is significantly faster than using a browser.

Download: DuckDuckGo (Free)

Download: Wikipedia (Free)

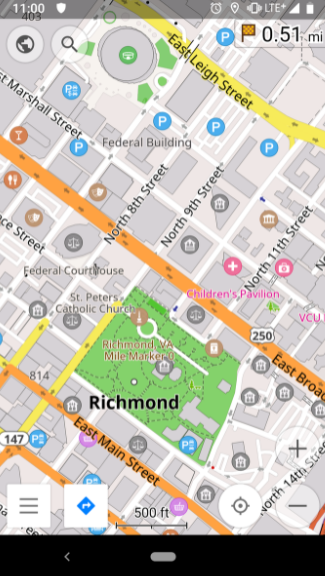
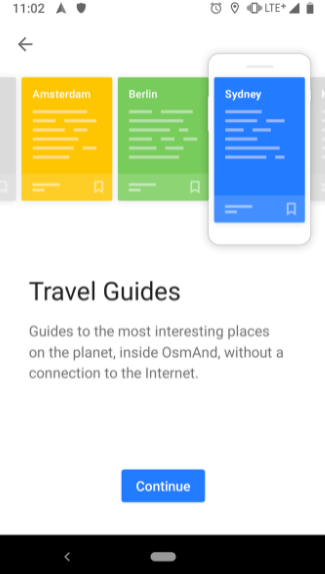
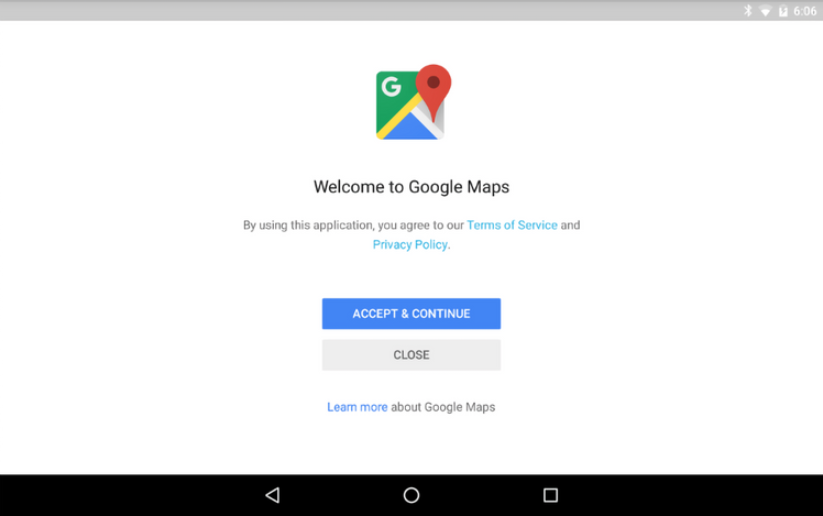
Although Google Maps may be used without a Google account, I had already reduced my usage before ditching the Play Store. Instead, I experimented with Sygic and Nokia Here. Outside of the Play Store, these apps are still available.

I eventually settled on OsmAnd after deciding to pursue the open-source path. It isn’t as spectacular as other navigation programs, but it does have its advantages, such as the ability to download free maps of most of the world. Because OSMAnd isn’t very good at detecting street addresses on its own, I propose coupling it with an address-locating tool like Acastus.

Download: OsmAnd (Free)

Download: Acastus Photon (Free)

Podcasts

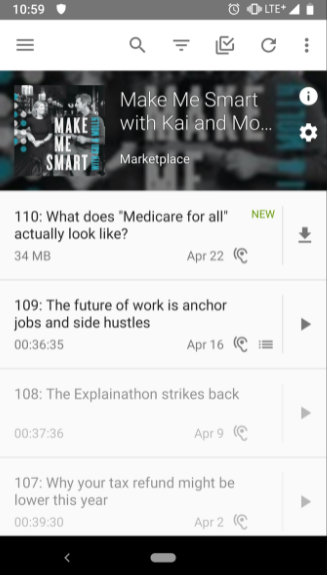
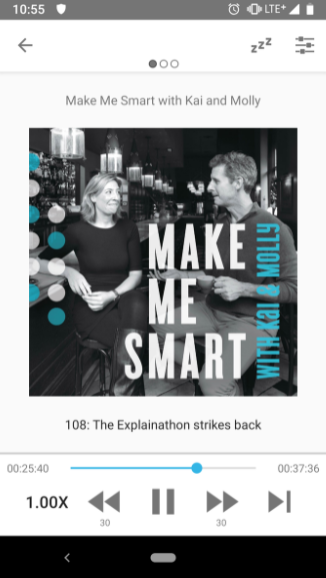
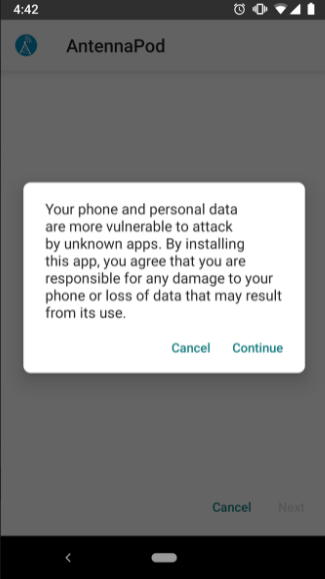
For me, podcasts are a huge source of enjoyment. BeyondPod was my former favorite podcast software, but I’ve recently switched to AntennaPod.

There are only a few other options in F-Droid, but if you don’t mind working around that limitation, you should have no trouble finding a nice podcast software in your preferred app store.

Download: AntennaPod (Free)

Notes and To-Do Lists

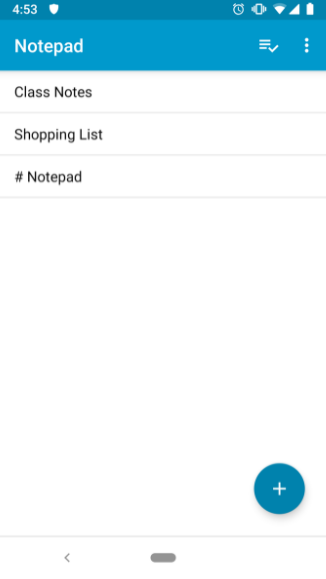
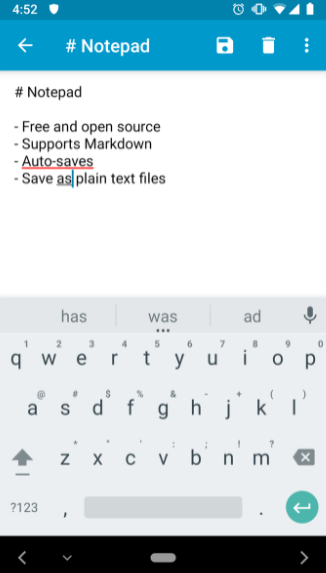
I like Google Keep a lot, but I don’t like how it syncs everything to the cloud. As a result, Evernote and similar solutions irritate me. I like apps that solely keep my notes on my device. There are a number of options available, fortunately:

Download: Mirakel (Free)

Download: Notepad (Free)

Download: Tasks (Free)

Really, That’s All You Needed?

To a large extent. My phone came with a decent music player, and most phones’ operating systems do as well. If you’re looking for something to listen to, try Shuttle, which is available on the Amazon Appstore, or Spotify.

Facebook, Pinterest, Instagram, and Twitter are the most popular social media platforms. Amazon’s gaming shop is also brimming with options.

Living Without Google Play Services

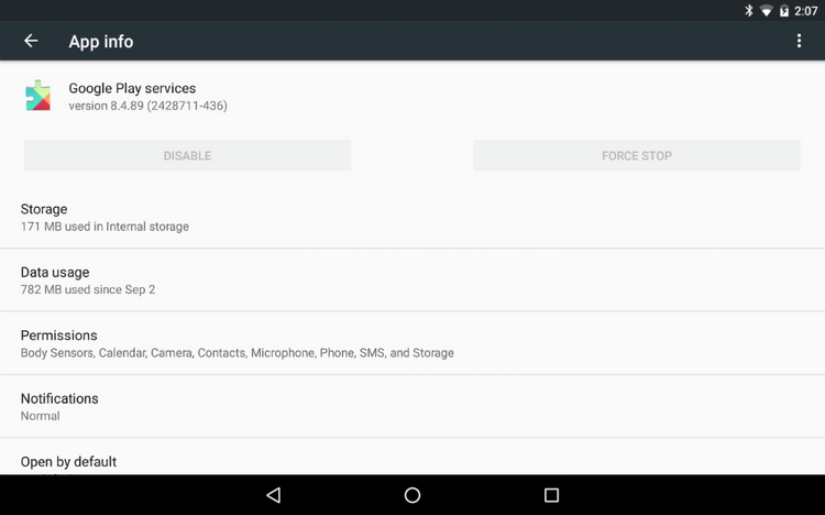
Not logging into your Google account disconnects Google from your personal information, but it does not unhook Google from your device. You must uninstall Google Play services to truly be Google-free. However, you won’t be able to accomplish so without putting out some work. This isn’t one of those apps that you can turn off right away.

There are two options available to you. Rooting your phone is the least invasive approach, as it allows you to eliminate applications that you wouldn’t be able to remove otherwise. The second option is to use a custom ROM to replace your phone’s native operating system. I opted for the latter option.

Even after you’ve done this, certain apps will still require Google Play Services to function properly. This means you’ll have to give up some great third-party apps like Pushbullet. Unfortunately, Google Play Services-required apps aren’t explicitly marked.

As it turned out, the best option I could come up with was to use only apps that I could locate in F-Droid. Despite this, you should be able to get by with whatever you can find on Amazon or in other markets that don’t have Google apps. Unless you start looking for APKs on the internet, you’ll be good.

What if I Just Use Google Play Services?

If you want to avoid Google, it’s usually because you don’t want to give the business access to so much data.

So, go to the Google Play services Play Store website and look at the list of permissions that are necessary. Because the background service is pre-installed on most devices and only draws notice to itself when it crashes, you may not have done this before. In any case, take note of how you’re allowing access to almost everything.

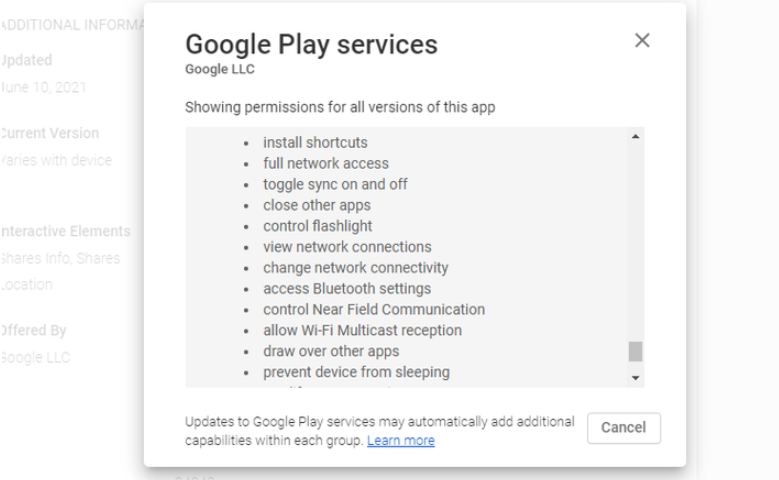
This isn’t some sort of dark secret. You can see how Google Play services are supposed to work with Android and Android apps on the Google Developers site. The majority of those permissions are almost certainly in place to make this integration possible.

Nonetheless, you’re giving a lot of power to a single program that communicates to faraway servers without your knowledge.

But I Can’t Do Without Google!

You don’t have to completely shut yourself off. You can still sign into Google sites from your mobile device in the same way you can from a computer. Although the experience won’t be as nice as using native apps, if you’re concerned about privacy, this alternative allows you to browse incognito mode or manually remove cookies whenever you want.

If you run a custom ROM, you can also install microG, which is an open source reimplementation of Google Play services. It will let you run apps that rely on Play services, will not monitor your data, and will allow you to disable some API features.

Is Using Android Without Google Worth It?

We’ve given out a lot of personal information to smartphone manufacturers, but this isn’t a story exclusive to Android or even iOS. With every social network, free email service, online mapping site, and apparently every other internet-based service, we’ve accepted this trade-off.

There are a variety of ways to deal with this new reality, but as stated at the outset of every EULA agreement, you can either accept it or opt-out.

I’m not trying to persuade everyone to abandon Google. The business has made a positive impact. Android as a whole is mostly a Google effort, even without the Play Store. However, because Android devices (and Chromebooks) are built on Linux, an open source developer like myself has the ability to make these changes.

Going Google-free allows privacy-conscious people to have more control over their gadgets. It allows minimalists to remove anything that isn’t required to make calls and access the web. This provides us all the chance to opt out without having to toss our phones away. What if there’s no Google? No difficulty for me.


How to Turn Your Smartphone Into a Webcam

How to Turn Your Smartphone Into a Webcam

Using your phone (old or new) as a camera for your Zoom meetings is an easy and affordable way to be visibly present if you don’t have a webcam on your laptop or PC.

A YEAR INTO THE PANDEMIC, IT’S STILL DIFFICULT TO FIND A GOOD WEBCAM AT A REASONABLE PRICE. Interacting on video has become a requirement, whether for work or a weekly virtual board game session. We’ll show you how to utilize your smartphone (old or new, Android or iOS) as an alternative in the sections below.

In addition, we have a guide on how to utilize a mirrorless camera or action cam as a webcam replacement, as well as a number of recommendations in our Best Webcams guide.

Table of Contents
No PC Required
Windows PC Users
Mac Users

How to Video Call With Just Your Phone

Before attempting to transform your smartphone into a PC webcam, it may be more obvious to simply use your smartphone to host a video meeting. The majority of services, such as Zoom, Google Meet, and Microsoft Teams, have Android and iPhone apps. To participate in the meeting, simply download the app, log in, and utilize your phone’s selfie camera and microphone.

Invest in a small tripod to prop your phone up so you don’t have to balance it against a stack of books, whether you do this or follow our ideas below. The Joby GripTight is a popular and inexpensive tripod with legs that can bend to stay steady on practically any surface, though a height-adjustable tripod like this would be a better choice. The Mobile Creator Lighting Kit from Lume Cube is also solid, and it includes a light panel to brighten up your face.

Ways to Use Your Phone as a Webcam

If you just need to sit in a conference and chime in every now and then, a videoconferencing app on your phone will suffice, but if you’re giving a presentation and need to share your screen, you’ll need a more sophisticated setup. If you don’t have a webcam for your desktop or if the one in your laptop isn’t working, you might use your smartphone as a webcam (or sits at a strange angle).

When installing a webcam client on your desktop PC or laptop, make sure your favourite videoconferencing app is closed. To get everything functional, you may need to reopen the app or restart your computer.

How to Use Any Phone as a Webcam for a Windows PC

If you have a Windows PC and an Android phone or iPhone, one of the simplest (and wireless) solutions is to use the DroidCam app. It’s also compatible with Linux.

DroidCam is free, but its DroidCamX software for Android hides a few features including improved video quality, contrast and sharpness tools, and more. It also removes advertisements. Using the Upgrade feature in the iPhone app’s settings, you can access similar functionality. Try the free version first, but if you use it frequently, the $5 upgrade may be worthwhile.

Steps to Set Up DroidCam:

1. On your phone, go to the Google Play Store or the Apple App Store and download the app. (You must have an Android phone that is running Android 5.0 or higher.) Go to Settings > About Phone > Android Version to find out. You can check if your iPhone is running iOS 9 or later by navigating to Settings > General > About > Software Version.

2. On your PC, install the Windows client. Follow the installation instructions provided by the setup wizard.

3. On your desktop, you should see the DroidCamApp icon. To open it, double-click it. On your Android phone, open the app and provide it access to your camera and microphone. Ensure that your phone and computer are both linked to the same Wi-Fi network. (If your desktop is connected over Ethernet, it will also work.)

4. After Wi-Fi IP and DroidCam Port on the phone app, you’ll see some numbers. Fill in the Device IP and DroidCam Port fields on the PC software with these settings. Make sure that both the Video and Audio boxes are checked. Start by pressing the Start button. The camera will be launched by the phone app, and the feed will be seen on the PC client.

You must always launch the DroidCam PC client and app before it can work with your videoconferencing software (steps 4 and 5 above). Change the camera and microphone inputs to DroidCam and DroidCam Virtual Audio in your videoconferencing app’s preferences. It should begin utilising your phone’s hardware right away.

Note: DroidCam does not work with programs downloaded from the Microsoft Store on Windows. For example, instead of installing the app from the store, make sure you download the desktop client for Skype.

How to Use an iPhone/iPad as a Webcam for Windows or Mac

If you have an iPhone or iPad and wish to connect it to a Mac or Windows desktop (or both! ),Reincubate’s Camo app  is my favorite free choice. It also works on both Intel and M1 Macs.

Here’s how to get it working:

1. Reincubate Camo is a free app available on the App Store (requires iOS 12 and up).

2. Allow the app to access your microphone and camera by opening it and granting it permission.

3. Send yourself a link or use AirDrop to download the Mac or Windows client from the app (or just head here). Because the Windows app is still in beta, you’ll need to provide your email address in order to receive an invite. On your computer, click the downloaded file and follow the setup instructions to install it. After the client has been installed, run it.

4. Connect your iPhone or iPad to your Windows PC or Mac using a USB cable while the Camo app is active on your phone.

That is all there is to it. Open your video calling app and select Reincubate Camo as your webcam, just as you did with DroidCam. In your Mac’s settings, you can also select it as a microphone.

If you pay $40 per year or $5 per month for Camo Pro, you can unlock additional features. A lifetime membership costs $80, although most people will be satisfied with the 720p resolution of the free version.

Things to keep in mind: The Windows beta may have some issues. Additionally, while on a video call, the desktop client must be open. You can apply filters and erase the watermark using this client. Unlockable improvements include 1080p video and the option to use the iPhone’s other cameras if you pay for Camo Pro. There is currently no Android app available, but one is in the works.

Another Way to Use an iPhone/iPad With a Mac

Another free app I like is NeuralCam Live, which comes from the makers of a popular low-light camera app. It has excellent video quality, but support is limited in comparison to Camo. There is currently no Windows client (it is in development), and there is no Android app. It also doesn’t operate with later Macs that use Apple’s M1 processor (any Mac released after November 2020)—only Intel-based Macs. According to the company, a fix will be available soon.

A membership to NeuralCam Live Plus is available for $30 per year or $5 per month, but it is not required. It gets rid of advertisements, unlocks new filters, and adds a low-light option.

Here’s how to set up the free version:

1. On the App Store, get the NeuralCam Live app (requires iOS 13 and up).

2. Allow access to the camera and microphone by opening the app.

3. On your Mac, you’ll need to install a plug-in. You may AirDrop the plug-in file to your Mac via the phone app, or you can send it to yourself via email. You can also get it by clicking this link. When you open the file on your Mac, it should install immediately.

4. Use a cable to connect your iPhone or iPad to your Mac.

In your videoconferencing apps, you should now see NeuralCam Live as a camera choice. If your desktop video calling app is open, you may need to close it to see the choice. Restart your pc if that doesn’t work.

Note that, like most virtual camera services, NeuralCam Live does not work in Apple’s Safari web browser. If you want to use a service like Google Meet, you’ll need to switch to a different browser, such as Google Chrome or Mozilla Firefox. To improve your video quality, the app employs multiple machine learning algorithms, and there are some useful features to take use of, such as Gesture Guard, which blurs yourself if you touch your face (for example, if you sneeze) or if the program detects any nudity.

Another Way to Use an Android Phone With a Mac

If you have an Android phone and wish to utilize it with a Mac, your options are limited. I previously recommended EpocCam, but my experience with it was insufficient to endorse it. I’ve tried the Iriun app and like it, albeit it’s not as feature-rich as the other two. It’s a reasonable workaround for now, but when Camo (see above) provides Android support, I’ll probably recommend it.

How to get Iriun working:

1. On the Google Play Store, get the Iriun app (requires Android 5.1 and up).

2. Allow the app to use your microphone and camera by opening it on your phone.

3. Iriun’s website has a MacOS program that you may download and install (it also supports Windows, iOS, and Ubuntu).

4. When you start the client, it should automatically link with the phone app.

You’ve completed the task! Choose Iriun as your webcam app in your videoconferencing app.

Iriun Troubleshooting Tips:

I couldn’t get the Iriun webcam to function wirelessly in my videoconferencing software at first, so I had to use a cord. If you’re still having issues after completing steps 1 through 3, consider the following suggestions.

1. On your Android phone, enable Developer Options. Go to Settings > About Phone and tap seven times on the Build number. Now go to Settings > System and look for a new Developer settings option (it might be hidden under Advanced). To discover USB debugging, tap it and scroll down a little. Turn it on by toggling the switch.

2. Using a USB cord, connect your Android phone to your Mac.

3. When you open the app on both your phone and Mac, they should instantly connect. In your videoconferencing app, Iriun should now appear as a choice (wired or wireless).

I hope you find one of these programs useful!


How to Identify Music Playing on Your Android Phone

How to Identify Music Playing on Your Android Phone

Did you enjoy the song you just listened to on your Android phone? You can figure out what it’s named by following the steps below.

There are various methods for identifying the music playing in your environment. Have you ever wondered what the name of the music playing on your Android phone is? A YouTube video, a live stream, a Snapchat snap, or an Instagram story could all sources.

You can directly identify the name of the music playing on your phone thanks to Shazam. You can Shazam whatever you’re listening to, whether it’s through your phone’s speakers or headphones. Here’s how to do it.

Enable Shazam in Other Apps

Begin by downloading Shazam from the Google Play Store. It’s completely free.

To identify the music playing on your Android smartphone, there are two ways to set up Shazam and use it in other apps. You can accomplish that by tapping a notification from the notification bar or a small floating bubble on your screen.

Use Shazam From the Notification Bar

This is a simple method for Shazaming music on your Android phone. Follow these procedures to enable this feature:

  1. Navigate to the Shazam app.
  2. Press on Library in the top left corner of your screen.
  3. Press the Settings icon. It should also appear in the top left corner.
  4. Then, in SHAZAM IN OTHER APPS, enable Shazam from notification bar.

On your notification bar, you should notice a permanent Shazam message that says Tap to Shazam. While music is playing on your smartphone, you can tap on that notification at any time, and Shazam will identify it for you.

Use Shazam From a Pop-Up

The software will display a small pop-up button on your screen that you may tap to Shazam tunes. Follow these procedures to enable this feature:

  1. Go to the Shazam app.
  2. Press on Library in the top left corner.
  3. Press on Settings.
  4. Enable Shazam from the notification bar and Shazam from Pop-Up in SHAZAM IN OTHER APPS.
  5. Shazam will ask you if you want to allow it to draw on top of other apps in a dialog window. Press GO TO SETTINGS.
  6. Enable the Allow display over other apps app permission in the settings.

Shazam will now send you a permanent notification on your notification bar. When you tap on the notification, a blue bubble with the Shazam logo appears on your screen. You can press it to see what music is currently playing on your phone.

Hold and drag the bubble to the bottom of the screen to eliminate it. Press on Tap to Shazam from the notification bar once again to make it appear.

Play Music From the Shazam App

The software will display the search results in the notification bar or in a pop-up window on your screen when you Shazam a song. You may listen to the music, see the lyrics, see the video, and learn more about it if it’s available by tapping on it.

Shazam also lets you hear a 90-second preview of the songs you’re looking for. Externally, you may listen to the entire song on Spotify or Apple Music. However, if you link your Apple Music account to Shazam, you may listen to entire songs directly in the Shazam app.

Shazam Does It All

While it has long been able to identify music playing around you, Shazam has now made it possible to detect music playing on your Android and iOS cellphones as well. You now know what to do if you hear some appealing music coming from your smartphone.


How to Fix HP Laptop Running Slow [2021 Guide]

How to Fix HP Laptop Running Slow [2021 Guide]

Is your HP laptop performing slowly or lagging for no apparent reason? You’re not the only one who feels this way. Similar issues have been reported by many people, and they are rather widespread.

The good news is that certain known solutions are available. Continue reading to find out what they are…

Try these fixes…

Other customers have reported success with the following remedies for the “HP Laptop Running Slow” issue. You might not need to try all of them; simply work your way down the list until you discover one that works!

1: Restart your laptop

2: Check for memory-hogging programs

3: Disable unnecessary startup items

4: Keep your laptop up-to-date

5: Clean up your hard drive

6: Update your drivers

7: Scan for virus and malware

8: Clear browser cache

Fix 1: Restart your laptop

This may seem self-evident, but we want to make sure we start with the basics before moving on to more sophisticated topics. It’s very critical to restart your laptop every two to three days, especially if it’s performing slowly.

Your computer’s RAM will be flushed, your CPU will be freed up, and any recent updates will begin to take effect when you restart your laptop.

If restarting your laptop doesn’t repair the problem, move on to the next step.

Fix 2: Check for memory-hogging programs

High RAM utilization isn’t generally a cause for concern, but if your laptop is slow, it’s conceivable that some apps have taken up too many resources, preventing your laptop from running at a higher speed. Here’s how to look for memory-intensive programs:

1. Right-click your taskbar and select Task Manager from the drop-down menu.

2. Look for processes that are consuming a lot of RAM under the Processes tab. Take Chrome, for example, and right-click it before selecting End Task.


Check to see if your laptop performs faster now that you’ve closed the time-consuming programs.

If that’s the case, try not to run all of those programs on your laptop at the same time. When your laptop is already slow or you want to keep it from becoming slower, multitasking is not a good idea.

If turning down memory-hogging programs doesn’t help, move on to the next step.

Fix 3: Disable unnecessary startup items

Excessive starting programs and services can cause your laptop to run slowly. It’s possible that some of the startup tasks were operating in the background. As a result, even if you aren’t using resource-intensive programs, your laptop may be slow. Here’s how to find the starting things you don’t require and disable the ones you don’t:

1. Right-click your taskbar and select Task Manager from the drop-down menu.

2. Move to the Startup tab, and disable the items you don’t need at startup.

3. Reboot your laptop.

Check to see whether your laptop is still slow. If this doesn’t work, try the next step.

Fix 4: Keep your laptop up-to-date

Every now and again, Windows Update pushes out new updates. You should always apply available updates so that specific system issues can be repaired, which will help your laptop work more smoothly. Simply follow these simple instructions:

1. Type update into the search bar next to your Start button, then click Check for updates.
(If the search bar isn’t visible, click the Start button and it will appear in the pop-up menu.)

2. Any available updates will be scanned by Windows. You’ll see a You’re up to date indicator if there are no available updates. You may also select View all optional updates to see if any are available and apply them if necessary.

If updates are available, select Install updates.

3. Allow it to take effect by restarting your computer.
If this doesn’t work, move on to the next step.

Fix 5: Clean up your hard drive

Your laptop may slow down if your hard disk is full or if there are too many old programs and files on it. Regularly cleaning out your hard drive can assist, and there are two things you can do:

1: Use the Disk Cleanup tool

2: Use cloud storage for large files

1: Use the Disk Cleanup tool

The Disk Cleanup tool is a built-in function of Windows that is simple to use. Here’s how to do it:

1. Type disk cleanup in the search bar next to the Start button, and then choose Disk Cleanup from the list of results.

2. The Disk Cleanup program scans your files and displays what can be deleted.
Before you delete any files, make sure you go over them thoroughly.

Tip: If you want to clean up your hard drive with a professional tool, we recommend CCleaner. It’s simple to use and does an excellent job of removing unnecessary files.

2: Use cloud storage for large files

Large files, such as films and project files, can take up a lot of storage space. Consider employing cloud storage services for massive files that aren’t used frequently.

For Windows users, Microsoft OneDrive is a good option. You can join up for a free 5GB plan or pay $1.99 per month for a 100GB plan. If you require additional storage, an Office 365 subscription includes a 1000GB option.

If clearing your hard disk doesn’t help, move on to the next step.

Fix 6: Update your drivers

Your laptop may slow down if any of your drivers are too old to perform the required activities. This is when your drivers must be updated.

You can get the correct drivers for your laptop in one of two ways: manually or automatically.

Manual driver update – You may use Device Manager to update your drivers. To test the issue, install any available updates as Device Manager suggests and restart your laptop.

Automatic driver update – If you don’t have the time, patience, or computer skills to manually update your drivers, you can use Driver Easy to do it for you. Driver Easy will automatically detect your system and identify the drivers that need to be updated, as well as your Windows version, before downloading and installing them correctly:

1) Download and install Driver Easy.

2) Launch Driver Easy and select Scan Now. After that, Driver Easy will check your computer for any problem drivers.

3) To automatically download the right version of the drivers, click the Update button next to the flagged drivers. You can then manually install them (you can do this with the FREE version). For example, if I want to update my graphics driver and network adapter drivers, I may do it by clicking Update and following the prompts.

Alternatively, you can select Update All to have all the missing or out-of-date drivers on your system immediately downloaded and installed. (The Pro version is required for this, which includes full support and a 30-day money-back guarantee.) When you click Update All, you’ll be asked to upgrade.)

Tip: The Pro version of Driver Easy comes with full technical support.
If you need assistance, please contact Driver Easy’s support team at support@drivereasy.com.

For the new drivers to take effect, restart your laptop. If updating drivers does not resolve your issue, proceed to the next step.

Fix 7: Scan for virus and malware

Viruses and malware will not only slow down your laptop, but they will also expose it to risks such as data leaking and security assaults. To protect your laptop from being hacked, you should run malware scans on a regular basis.

It can be done in a variety of ways. You may inspect your laptop with Windows Defender and eliminate anything that isn’t working. If you want professional antivirus software, here are some suggestions:

If scanning for viruses and spyware doesn’t help, try the last option.

Fix 8: Clear browser cache

If your laptop is slow, especially when you’re viewing the web, it’s probably due to an overabundance of cache. Clearing your browser cache is straightforward and only takes a few minutes. The procedures for doing it in Chrome are shown here, but they should be similar in other browsers. (You can also open this window by pressing Ctrl and Shift and Delete on your keyboard in most browsers.)

Hopefully, this post was helpful in resolving your issue, and your HP laptop is now up and running! If you have any questions or recommendations, please feel free to leave a remark.


How to speed up Chrome for Android

How to speed up Chrome for Android

Is Chrome for Android slowing you down? This set of tips and techniques will help you get more out of your experience.

Is Chrome for Android slowing you down? It’s possible that this is due to hardware or software constraints. While we can’t provide you with better specifications, we can provide you with some tips and methods for speeding up Chrome on Android. Let’s get this party started!

How to speed up Chrome for Android

Speed up Chrome by turning on Lite Mode

When evaluating browser performance, keep in mind that there are two key aspects to consider: hardware and data speeds. It makes no difference if you have the world’s quickest smartphone. The browser will only be as fast as your internet connection allows (the same goes the other way around). But what if you could reduce the amount of data your smartphone consumes?

That is exactly what the Lite Mode feature in Chrome for Android accomplishes. Turning on this option will send data to Google’s servers, where it will be compressed and optimized for smartphone use. After all, you don’t want to load those big images merely to see them on a small screen, do you? This will not only make your browsing a little faster and, as a result, Chrome for Android will speed up, but it will also help you save data.

How to turn on Lite Mode:

  1. Go to Chrome.
  2. Choose the 3-dot menu button on the top-right corner of the screen.
  3. Choose Settings.
  4. Pull down and select Lite Mode.
  5. Switch the setting on.

Kill the cache from time to time

A cache is actually beneficial. It saves surfing data in your local storage after loading it. It is significantly faster for the browser to just pull saved data rather than downloading it all over again when you load a page. The issue arises when you save too much cache data, as the files might become fragmented and corrupted, slowing down your browser. It’s a good idea to clean your browser cache every now and then to keep things fresh. It will result in lengthier loading times in the short term, but things should improve quickly.

How to clear the cache on Chrome for Android:

  1. Go to Chrome.
  2. Choose the 3-dot menu button on the top-right corner of the screen.
  3. Choose Settings.
  4. Pull down and select Lite Mode.
  5. Switch the setting on.

Preload pages for faster browsing

Google can be a little too smart at anticipating what you’ll do. All of that algorithmic magic can also help Chrome For Android run faster. Websites can be preloaded in the mobile browser before you visit them. This means that a site will frequently be pre-loaded before you even visit it. It speeds up the entire process, but there is one drawback. The key issue here is that doing so could result in a significant amount of data being wasted. If you’re on a limited internet budget, this isn’t ideal, but if you don’t mind squandering megabytes, you’ll probably appreciate the increased speed.

How to activate preloading pages:

  1. Go to Chrome.
  2. Choose the 3-dot menu button on the top-right corner of the screen.
  3. Choose Settings.
  4. Press on Privacy and security.
  5. Look for the Preload pages for faster browsing and searching option and turn it on.

Use Chrome shortcuts on your home screen

Perhaps your browser is as quick as it can be, therefore the best approach is to adapt to it and figure out how to go where you want to go faster on your own. Using home screen shortcuts for your frequently visited websites is one way to do this. If you’re always checking Android Authority, why not make it your home screen? This will save you the trouble of manually searching for the website in your browser.

How to make a website shortcut on Chrome:

  1. Go to Chrome.
  2. Navigate to the site you wish to create a shortcut for.
  3. Choose the 3-dot menu button on the top-right corner of the screen.
  4. Choose Add to Home screen.
  5. Edit the title as you wish.
  6. Choose Add.

Keep Chrome up to date

Note that Chrome is updated frequently, and the team is constantly working to improve efficiency, add features, and eliminate issues. Make sure your Chrome browser is always updated to the most recent version. This increases the likelihood of things working smoothly. Simply go to the Google Play Store and search for Chrome, then check sure it’s up to current.

Use Chrome’s experimental features

Check out the browser’s flags if you really want to dig into Chrome for Android to see if you can speed it faster. Simply type “chrome:/flags” into the URL bar to access the browser’s secret experiments. We have a dedicated post where we explain you how to do this and the Chrome flags we recommend.

 Speed up Chrome for Android by closing unused tabs

With Chrome for Android, it’s easy to get a little tab happy, but this could be slowing down your experience. Close all of the tabs you don’t need and clean up your browser to make it run more smoothly.

  1. Go to Chrome.
  2. In the top-right corner of the screen, press on the square icon (next to the 3-dot menu button).
  3. Tap the X button on the corner of each tab you want to close.

What To Do When The Power Button Of Your Android Phone Is Broken?

What To Do When The Power Button Of Your Android Phone Is Broken?

A broken power button appears to be the end of your device’s life. But don’t worry; there are many of options for keeping your smartphone operational even if the power button on your Android phone is broken.

Not all methods are compatible with all devices. We’ve prepared a list of options for dealing with a broken power button in this article, and you may pick the one that works best for you.

If your power button is malfunctioning, the most critical thing you can do to keep access to your device is to enable USB debugging and Scheduled Power ON.

How To Turn ON USB  debugging on Android?

1. Go to your Settings app.

2. Select Developer Options from the menu. If Developer Options isn’t available in Settings, go to About phone and tap on Build number a few times until you see a pop-up window that says “You are now a developer.”

3. Switch Developer options ON.

4. Locate USB debugging and press on it to toggle it ON.

How To Turn ON Scheduled Power ON?

You can turn Scheduled power ON/OFF in Settings to automate power ON and power OFF if your device supports it. If your smartphone shuts down due to a damaged power button, you may rest certain that it will restart at a pre-determined time.

  1. Go to the Settings menu. In the upper right corner, use the search button to look for “Scheduled power ON/OFF.”
  2. Switch Power ON and set the time you want it to power ON every day.

How To Unlock Your Android Device When Power Button Doesn’t Work

There are two instances in which you can be trapped with a broken power button. It’s possible that your device is switched on or off. Try not to let your smartphone turn off because gaining control of it without a power button is considerably easier when the gadget is turned on.

Ways to restart your device with a damaged power button when the device is OFF.

When your device’s charge is completely exhausted, simply connecting it to the charger may be enough to restart it. To boot into the recovery menu, try pressing your volume buttons in different combinations. By pressing the Power button, you can select “reboot system now.”

Use a USB cable to connect to a PC or laptop. This step may also cause the device to reboot.

You can use ADB commands to restart your device if USB debugging is enabled. ADB drivers can be found  here or here. After installing your device drivers, reboot your device using the “adb reboot” command. Follow the instructions for your unique gadget on the internet.

How to unlock your device with a broken power button when your device is in the switched-ON state

When the gadget is switched on, it is significantly easy to wake the screen. You might try calling your device from a different number to get the screen to light up. The screen may also be turned on by connecting the charger or a USB cord. The touch of a fingertip will wake up devices with fingerprint sensors.

Use double-tap to wake

When the gadget is switched on, it is significantly easy to wake the screen. You might try calling your device from a different number to get the screen to light up. The screen may also be turned on by connecting the charger or a USB cord. The touch of a fingertip will wake up devices with fingerprint sensors.

Apps can also be used to compensate for the lack of a power button. These programs can switch your screen OFF, wake it up, or perform the most basic function of starting up your device.

Apps to replace your power button

Note that most apps of this type make use of device administrator privileges. You must first go to Settings>>Device Administrators and untick the app from the list before deleting it.

Shake to Lock/Unlock

It’s a simple app that does exactly what it says on the tin. A simple shake can both wake up and switch OFF your display.

Gravity Screen

If your power button is broken, Gravity Screen is a fantastic app to have. When you put your phone in your pocket or on a flat surface, it might automatically turn off the screen. While the gadget is in motion, you can select to keep the screen on. The gravity screen allows you to customize its various sensitivities by setting your own parameters.

Power Button to Volume Button

This program can turn your volume button into a power button, allowing you to wake up your screen from sleep mode. However, you will not be able to use it to restart your device. It can also display a persistent notification in your notification panel that, when tapped, turns your screen off.

Although these apps are useful, they can be draining on your battery and shorten its life over time. Consider these apps and procedures as a temporary remedy before visiting a nearby store to get your device serviced permanently.

So, if the power button on your Android phone isn’t working, you can use one of these methods to unlock it. In terms of repairing your broken power button, there are two options.

Hard reset your Android phone

Your malfunctioning power button could, believe it or not, be the consequence of a software issue on your phone. As a result, you should try resetting your device to restore functionality.

Check your phone’s manufacturer’s website to see whether they’ve produced a device reset tool for it. When I soft bricked my Sony Xperia while installing a custom ROM, I discovered one.

Send it for repair

If the power button is physically destroyed, resetting the phone will not cure the problem. Sending your phone in for repair is the next natural step. It’s conceivable that your phone is still under warranty, in which case you’ll be able to get it mended for free.

Were these suggestions for dealing with a broken power button helpful? Let us know what you think in the comments.


1 2 3 4 5 15