Xiaomi LED Screenbar Monitor Lamp Review

Computers are our main source of productivity. Every day, we spend a significant amount of time in front of a computer screen, whether for business or enjoyment. I believe that most individuals dislike working and living in dim light. High-powered desk lamps are typically used to boost the brightness of ambient lighting. However, for the lighting effect of the computer display area, this solution is not very good. Because of the phenomenon of light refraction, the screen reflects light, making it difficult to see and appear hazy.

» Read more

How to Install Raspberry Pi OS on Your Raspberry Pi

Get the new official Raspberry Pi OS on your Pi.

Raspberry Pi OS, a new update and name change for the classic Raspberry Pi operating system Raspbian, was recently announced by the Raspberry Pi Foundation. The Raspberry Pi OS is immediately installable and includes everything you’ll need to support the new Raspberry Pi 4 8 GB module. There are several options for installing the new operating system.

Before you update to the new OS, make a backup of your current Raspberry Pi image in case something goes wrong. For assistance with this operation, see our guides on how to back up your Pi image on Windows or Mac.

 Table of Contents

JUMP TO STEP:

  1. Install using Raspberry Pi Imager
  2. Using third-party imaging software
  3. Troubleshooting

1. Install using Raspberry Pi Imager

Using the Raspberry Pi Imager, you may quickly install Raspberry Pi OS. This is an official imaging application that makes flashing a microSD card considerably simpler and more pleasant to novice users. A detailed description of how to use the Raspberry Pi Imager here.

  1. From the Raspberry Pi downloads page, Raspberry Pi downloads page for your operating system.
  2. To finish the installation, run the installer and follow the prompts.
  3.  Click Choose OS in Raspberry Pi Imager.
  4. Choose Raspberry Pi OS from the drop-down menu.
  5. Select Choose SD card and choose the microSD card you want to flash the new OS to and tap Write.

You can connect your microSD card to the Pi and boot it up after the imager is finished.

2. Using third-party imaging software

You can also write the Raspberry Pi OS image to a microSD card using third-party imaging software. Connect the Raspberry Pi to your computer after turning it off and removing the SD card.

When it comes to imaging software, there are various possibilities. Etcher is a popular tool that is known to function well with Raspberry Pi images. This program can be used to flash any image compatible with your Pi’s microSD card.

  1. Choose an imaging application to download and install.
  2. The Raspberry Pi OS image can be downloaded from the Raspberry Pi downloads page.
  3. Set the microSD card to the one you want to use for your Pi and point the imager to the Raspberry Pi OS image file.
  4. You can test the image after it has been flashed by attaching it to the Pi and attempting to boot it.

3. Troubleshooting

While trying to set up the new Raspberry Pi OS, you’re likely to run across a few snags.

OS Not Loading

If the Raspberry Pi OS image fails to boot, reformat the SD card and try again. If the computer still won’t boot, make sure the SD card is big enough. You could try reinstalling Raspbian Buster to see if the problem is with the OS or the Pi hardware.

Incompatible Software

Some software may be incompatible with the new operating system. You can either wait for the program’s makers to upgrade it to work with the new changes, or you can go back to an older edition, such as Raspbian Buster.

In this tutorial, we are gonna show you how to install Retropie on your Raspberry Pi 4:

Imaging Issues

If you get an error when trying to image the microSD card, look up the error code online to figure out what the issue is. If you can’t locate anything related to your problem, make sure your microSD card can handle the Raspberry Pi OS. Before attempting to reimage the card, you might want to try formatting it.


3 Easy Wasys to Update iPhone without WiFi to iOS 14

I’m now utilizing cellular data because I don’t have access to WiFi to update my iPhone 6S’s operating system.

When iOS 14/iPadOS 14 was released, many people wondered, “What if I don’t have wifi to update my iPhone?”

There are a few options for updating iOS without access to WiFi. The methods that follow do not necessitate a stable WiFi connection. Without further ado, let’s go to work on resolving this issue.

What If I Don’t Have WiFi to Update My iPhone?

If you’ve ever tried to update your iPhone using mobile data, you’ll know that your iPhone won’t let you do so without WiFi. Because Apple restricts iOS upgrades over mobile data, you’ll need a WiFi connection to keep your phone up to date.

iPhone Update Without WiFi via Hotspot

There is a way to get the iOS 14 Update without using WiFi. You may update iOS 14 by setting up a personal hotspot on a spare phone and using it as a WiFi network. It will be treated as any other WiFi connection by your iPhone, and you will be able to update to the latest iOS version.

1. Open the Settings app on your other device, if it’s an iPhone, and tap Cellular.

2. Turn on the Personal Hotspot option by tapping on it.

3. Return to the main iPhone you’d like to update. Connect to the personal hotspot you just created by opening the Settings app and tapping on Wi-Fi.

4. Once connected, go to Settings > General > Software Update and wait for your iPhone to check for new updates and download them.

That’s how you may update your iPhone without WiFi by using the hotspot on another phone.

Update iOS without Wi-Fi Using iTunes/Finder

If you don’t have access to another smartphone but do have a computer with iTunes or Finder, you can update the iOS version on your iPhone using these apps. Keep in mind that the procedure will only function if your computer has an active Internet connection.

Using iTunes or the Finder, here’s how to update iOS without WiFi.

1. Connect your iPhone to your computer via a USB cord and open the iTunes program.

2. In the app, go to the Summary tab in the left sidebar and select your iPhone.

3. On the right-hand side pane, click the Check for Update button.

4. To get the most recent version of iOS and upgrade your iPhone, go to Download and Update.

The most recent version of iOS should now be installed on your iPhone. Using Apple’s own iTunes or Finder apps, you may download iOS updates without using WiFi.

Use ReiBoot to Update iPhone without WiFi

The most recent version of iOS should now be installed on your iPhone. Using Apple’s own iTunes or Finder apps, you may download iOS updates without using WiFi.

Tenorshare ReiBoot is a program that allows you to upgrade your iPhone to the most recent iOS version while also assisting you in resolving all iOS update issues such as iPhone update stuck on Apple LogoiOS 14 update frozen. It’s a simple and quick way to update your iPhone without using WiFi.

It downloads the most recent firmware version and then installs it on your device. Using this software on your PC, you can get software updates without WiFi.

1. Install it on your PC after downloading it. Using a USB cord, connect your iPhone to your computer.

2. In the software, select Start.

3. Select Standard Repair from the drop-down menu.

4. To get the newest firmware for your iPhone, click the Download option.

5. To repair your iPhone, click Start Standard Repair after the software has been downloaded. When your iPhone is updated, you will see the following on your screen.

Utilizing the ReiBoot software, you may update your iPhone without using WiFi.

Download iOS Update without WiFi from Website

You can download the iOS update file to your computer and then manually apply it to your phone if you have Internet access on your computer. The firmware will be installed through the iTunes program.

1. Go to the IPSW files page using your browser.

2. Choose your device and get the most recent IPSW file for it.

3. Connect your iPhone to your computer and launch the iTunes app.

4. You must simultaneously press ‘Option’ and click the ‘Update’ button on your Mac.

You must simultaneously press ‘Shift’ and click the ‘Update’ button on your Windows PC.

5. Allow iTunes to apply the IPSW file you downloaded to your PC to your device.

Your iPhone should now be running the most recent iOS version that you downloaded.

Wrapping Up

While you won’t be able to upgrade your iPhone using data due to Apple’s restrictions, you can utilize the alternate techniques to complete the operation and update your device to the current iOS version. We hope this information aids you in completing the task at hand.


How to speed up a slow iPhone backup or iCloud backup

My backup has just reached 78% complete after 36 and a half hours.

Is your iTunes or iCloud backup or restore taking so long that you’ve decided to skip it? It may certainly be aggravating and frustrating. Here are a few suggestions to help you speed up your iTunes backup, sync, or restore procedure.

Delete old unused apps that have a lot of app data

As a result, you’ll have less data to send during each backup or restore. It will greatly expedite the procedure. Your phone will not directly back up or restore the apps, but it will do so for their data. (Instead of using your backup, apps are downloaded directly from the App Store when your phone is recovered.)

Remove unused media from iPhone, iPad or iPod

If you believe that the only option for speeding up your process is to use old programs, you are mistaken. Getting rid of old media like videos, music, recordings, and voicemails can also assist. Before you go back up, get rid of those albums you don’t listen to anymore or modify the music settings.

Move your photos to your computer — or to iCloud Photo Library

It’s a good idea to back up your iPhone photos to your PC or Mac, or to iCloud Photo Library, from time to time. Before removing them, double-check that they were successfully copied to your computer. Keep your images safe and secure, and you’ll notice a significant improvement in your backup procedure. Other media, particularly old videos, can be stored on your computer by archiving an old backup or simply copying from the device through USB. Your time and space are both free!

Create regular iTunes or iCloud backups

Apple’s backups are differential, which means that just the new data has to be added each time you back up. As a result, the more often you back up, the faster it will be each time. If you’re going to clear your files to speed up your iPhone backup process, make a backup beforehand and save it somewhere other than the default iTunes location.

Avoid sending crash reports to Apple every iTunes sync

Crash reports sent to Apple by iTunes can lengthen backup times since iTunes must first copy and submit them before creating the backup. To avoid iTunes submitting crash reports and saving time, do the following:

  • On your iPhone, iPad, or iPod, turn off automatic syncing.
  • Right-click on your iOS device in iTunes and select “Reset Warnings”; your system will ask if you want to send the reports the next time you sync.
  • Uncheck the box that says “Don’t ask me again” and click “Don’t Send.”

Ensure you’re using the right connection

If you want to back up using iTunes over USB, make sure you have a fast internet connection. If you have a Mac, you should expect all of your USB ports to be extremely quick. If your computer has a USB3 port, you should use it if you’re using a Windows PC. These are the blue ones that are built right into your computer or laptop. Your monitor’s, keyboard’s, or USB hub’s ports are most likely slower.

iPhone Backup Extractor can create backups for you

If you’re having trouble with the iTunes interface, you could discover that using iPhone Backup Extractor to create backups for you saves you time. This feature is available for free in iPhone Backup Extractor for Windows and macOS, just like it is in iTunes. Here’s how to back up your iPhone with iPhone Backup Extractor, iTunes, or iCloud.


How to Install Microsoft Office Professional Plus 2010 in Android phone Using Exagear Mod 2021

Description

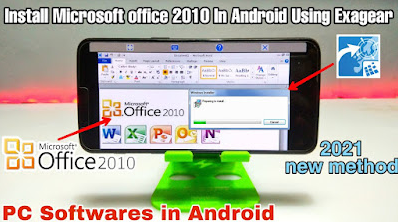
In this post, I’ll teach you how to use Exagear Windows Emulator to install and run Microsoft Office Plus 2010 on your Android smartphone. So, ms office is a very popular software in Windows for creating various types of documents. You can create documents such as word, excel, power point, and many others. In this tutorial, I’ll show you how to install and run MS office 2010 on your Android smartphone using the Exagear Windows Emulator.

Exagear Windows Emulator

Exagear Windows Emulator is a smartphone emulator for Android devices. So, here is the Android Emulator in which you may run any Windows software. In an Android phone, there is an exe file. We can install or play any app or game from the Google Play Store or the internet on Android. In the same way that Android has different applications, Windows PC has different Software. There are many different Software’s available for Windows PC with various purposes of use such as document creation, server, educational, and much more. However, Android has some limitations.

So, thanks to the creators of this application called Exagear, which is an Android emulator. While using this application, we can run a variety of Windows PC software without issue, and we can also play a variety of Windows PC games in Android.

ExaGear is a virtual machine that allows Windows PC apps to run on ARM Android devices and ARM Chromebooks. Play your favorite old games and use your everyday PC apps on your phone, tablet, or Chromebook – quickly and without any issues. Our ground-breaking technology allows you to use all of your office programs on your Android device as if they were local apps. ExaGear can distribute the following list of Windows apps and games till further notice.

StarCraft is a Microsoft Office program. Devotees 2 Aftermath 1/2 Diablo 2 Legends of Might and Wizardry 3/4 Human Advancement III by Sid Meier Complete Destruction of the Crusader Fortress Also, Caesar III has a lot more!

StarCraft is a Microsoft Office program. Devotees 2 Aftermath 1/2 Diablo 2 Legends of Might and Wizardry 3/4 Human Advancement III by Sid Meier Complete Destruction of the Crusader Fortress Also, Caesar III has a lot more!

You must first install this program on your Android device before using it. You must first download the computer software or game you wish to use, and then install it in Exagear, which is a lengthy process. following the installation of all applications and games stored in the Exagear Application.

You may run a variety of software programs such as MS Office, PhotoShop, Typing Master, Paint, and others, as well as Windows PC games such as CS, CS GO, Civilization, Star Wars, Panzer, and others.

Although there are other Android emulators, Exagear Windows Emulator is the best for installing PC software on Android smartphones.

Microsoft Office 2010

Microsoft Office 2010 was released in late spring of 2010, bringing with it not only redesigned versions of all of its award-winning productivity applications such as Word, Excel, and PowerPoint, but also online-based add-ons that finally allowed users from all over the world to collaborate on the creation of new documents. Despite this, Microsoft Corp’s experience aided this amazing development of the Office equation.

Office 2010 is compatible with Windows XP SP3, Windows Server 2003 SP2, Windows Vista SP1 or newer versions, but it might be installed on older XP service packs via a library vulnerability. It’s the last version of Microsoft Office that works with Windows XP, Windows Vista, Windows Server 2003, and Windows Server 2008; Office 2013, on the other hand, does not support these operating systems.

Office 2010 replaces the Glue Uncommon exchange box and Glue Recuperation feature seen in previous versions of Office with a gluing options display on the strip, in the configuration menu, and in the article ordered UI. Live is acquainted with the display. When clients place the mouse cursor over a choice in the display, the aftereffect of the interaction may be seen before it is applied to the report; a tooltip with a corresponding depiction and console simple path for that option will also appear. When clients place their mouse pointer over an exhibition option in the setting menu, the rest of the setting menu becomes simple, allowing them to examine results inside the archive.

During the development of the archetypal Office 2007, designers gathered to introduce the audience to the new graphical UI (Fluent User Interface), a wide range of instruments, and cooperative effort highlights. With Office 2007 as their foundation, another version of this productivity suite figured out how to become one of the most praised setups for record generation, synergy administration, and archive work process streamlining obtainable, vastly outperforming any competition.

Note :- Download links are mentioned in articles

So, let’s get started with how to install and use Microsoft Office 2010 on any Android phone. To begin, download the required MS Office setup file and install the Exagear Windows Emulator application on your Android smartphone. All of the download URLs are provided in the post below, so download all of the files and save them to your smartphone. Storage on the inside

Steps

So let’s start the Procedure to Install & Run Microsoft Office Plus 2010 In Android Using Exagear 

Step 1 – Emulator require 

Exagear Windows Emulator can be downloaded and installed. It’s available for download here. For the Exagear apk :- click here and OBB file :- click here. Download and install on your Android phone using the above-mentioned YouTube video link for a tutorial on how to do so.

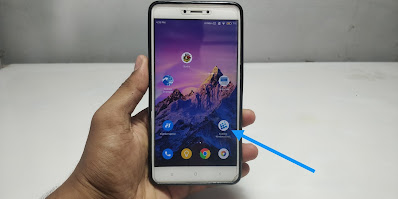
Open the exagear app when it has been downloaded and installed.

Step 2 – Getting into app

After you’ve opened the app, you’ll be able to see the app’s interface. There are three lines in the top left corner that you must click on.

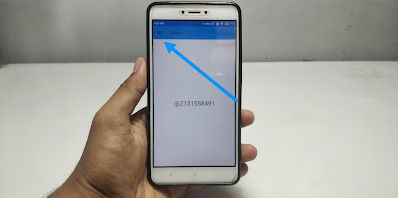
Step 3 – creating container

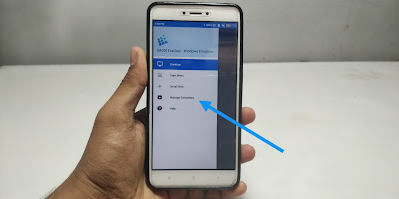
After clicking those three lines, a menu appears on the screen. You must, as you can see, click on Manage Containers.

Step 4 – opening container

After clicking on Manage Containers, you will get a blank screen. To create a new container, click on the top right plus button, as seen in my YouTube video. Give the container a name. After you’ve created a container, click the right three dots.

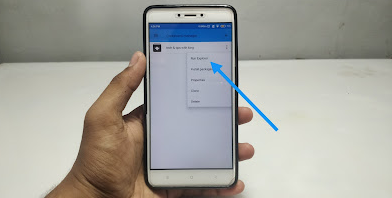
After clicking on the three dots, select Run Explorer to access the emulator’s file explorer.

Step 5 – getting start with desktop

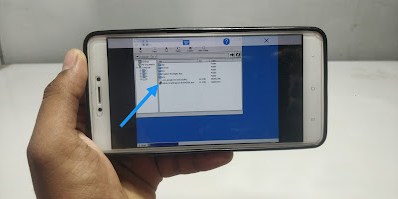
Then a desktop and a file explorer appear on the screen, and you can see your download folder files. Download Microsoft office 2010 setup file :- click here

Note: This emulator will use your internal storage Download Folder as a D: disk, allowing you to view any file stored on your Android device.

Step 6 – opening setup file

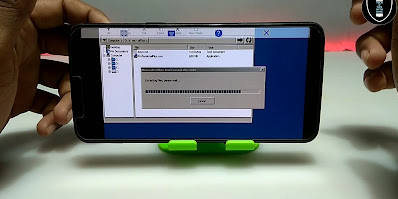
As you can see in the above image, the installation procedure begins after you click open software, and the loading screen bar appears.

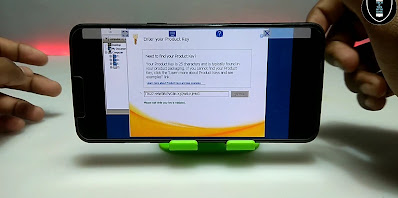
Step 7 – product key

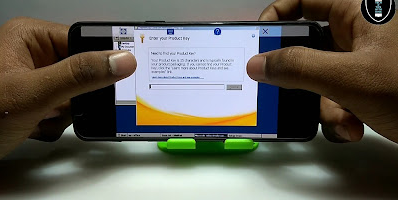
after a brief delay in displaying the loading screen bar Now it will ask you to enter the product key for this MS Office Software, which you can find in the software setup file in the .txt format.

Step 8 – copy key

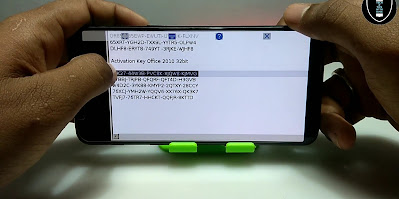
So, as you can see in the above photo, I’ve opened the key.txt file and it’s showing a number of keys. You need to go into the 32bit area and select any of them. If the first one doesn’t work, try the second, then the third, and so on. Copy the key and paste it in the appropriate location.

Step 9 – final key

As you can see, I’ve pasted the key where it asks for it, so it’ll take some time to verify the key and make sure you’re connected to the internet after you’ve pasted it.

Step 10 – install

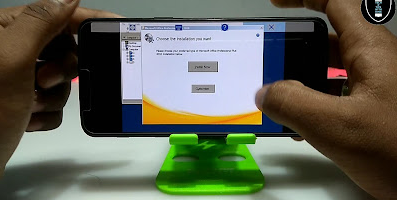
After spending some time verifying the key, the software will ultimately validate the key. If the key is not legitimate, it will display key not valid, and you will need to update it. If the key is verified, you will see a button similar to the one shown above, which you must click to install.

Step 11 – installing

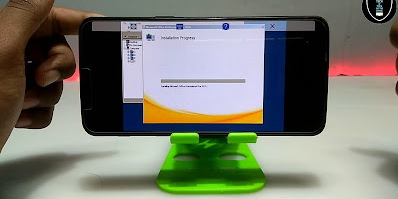
After clicking on install, you will have to wait for roughly 10 to 15 minutes because MS Office is a large piece of software that needs to be installed here.

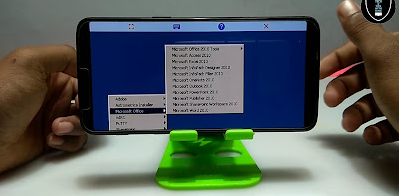
After a lengthy wait, MS Office has finally been successfully installed in exagear. From the start button menu, you can see it. As you can see in the above photo, MS Office 2010 has a wide range of applications, including word, excel, PowerPoint, Access, and much more.

Step 12 – opening software

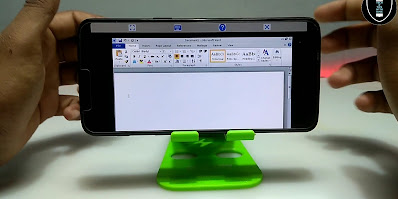
You can now launch any document creation software and create a large number of documents in Microsoft Office. The most useful and crucial feature of this software is that it allows you to view your Android internal storage files, edit them, and save any document created in MS Office to your Android internal storage.

If you’re having difficulties downloading a file from my website, click this link to view a video tutorial on how to do so:- https://www.techtipswithking.com/2021/12/how-to-download-from-tech-tips-with-king-links.html

Conclusion

So now we may create an unlimited number of documents in Android using Microsoft Office 2010 for free. Now you can not only generate documents in Android, but you can also edit or recreate them in MS Office 2010 in Exagear.


1 2